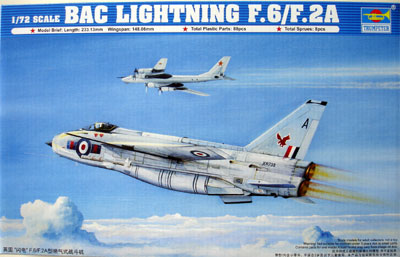
Trumpeter kit in 1/72 scale
1/72 scale BAC Lightning F6 (Trumpeter kit)
Most Lightnings were armed with two 30mm Aden canons and with the Firestreak or Red Top air to air missiles. The F2.A had the Firestreak missiles and nose mounted Aden canons. The F6 had Red Top missiles and usually also canons in a belly fairing. The F6 could also accommodate two large fueltanks on top of the wings!
In the past, several 1/72 kits of the Lightning appeared, many re-issues and many not accurate. First was FROG (later Hasegawa reboxing) and than the better Airfix Lightning. This was the best kit for many years, than came Matchbox and some specialist resin kits. Now Trumpeter comes with several Lightning kits that are by far the best in the scale (including one in 1/32 scale!, so as alternative to the well sought after and excellent vacuform ECHELON kit). Look here for a build on that kit in 1/32 scale.
The Trumpeter
kit #1654 for the Lightning F.2A / F.6 kit has some optional parts to
either variant. There are inaccuracies, some of which will try to correct.
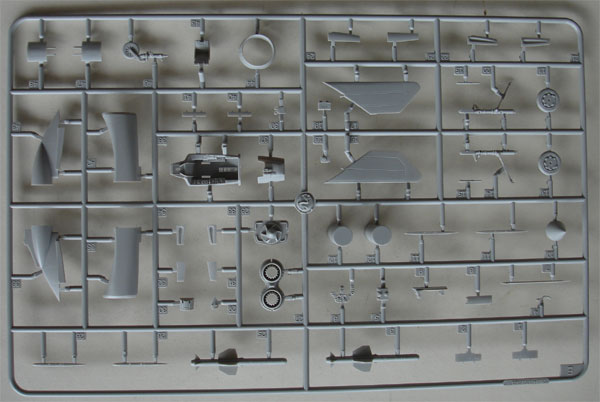
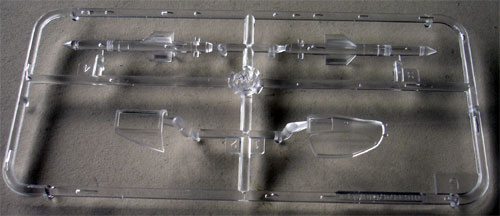
There are about 90 parts in the kit, including the missiles and upper wing tanks. The canopy can be set open as well as the rear airbrakes and flaps. The landing gear is very fine. The wing shape with its camber look very good. Surface detailling looks just about right but I did not count the rivets and panel lines. The location of the refuelling probe is not indicated correctly in the instructions but it can be set in the correct position without a problem.
.
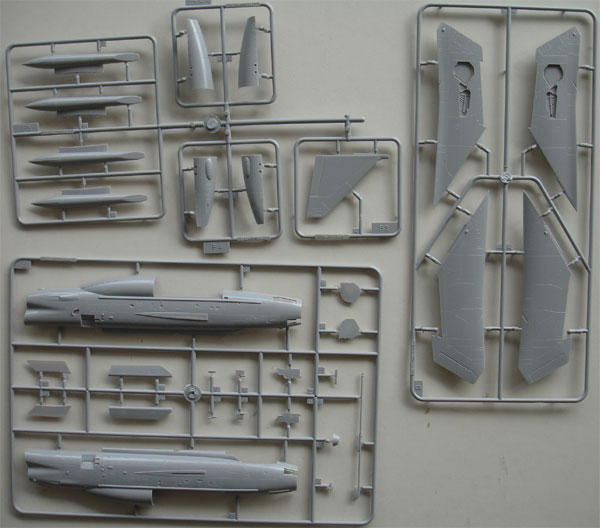
The kit missiles are transparant,
so you can suggest the glass seeker nose.
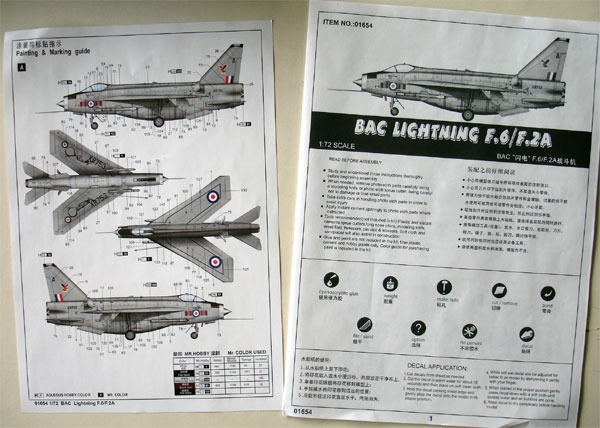
Trumpeter markings are included for
two aircraft:
Lightning F.2A, XN781, 19 Sqn, RAF
Lightning F.6, XR753, 23 Sqn, RAF
.
The roundel colours are inaccurate
so the roundels are to be substituted by others like from XTRADECAL.
The blue colours are far too dark. 
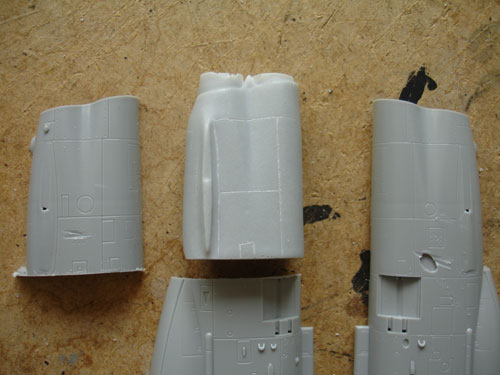
Unfortunately, the shape of the rear
fuselage at the engine exhausts is not OK: the shape is too narrow and
the curves too pronounced. The same applies for the belly fairings, which
are far too big. The intake ring is not sharp edged and wrong profile.
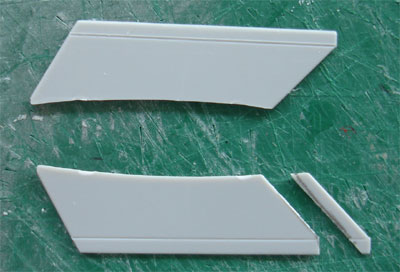
These errors are quite noticable, but in our rescue come two correction sets from HERITAGE AVIATION MODELS, a set for the belly and a set for the rear fuselage area and replacements for the intake ring and nose intake bullet from casted metal.
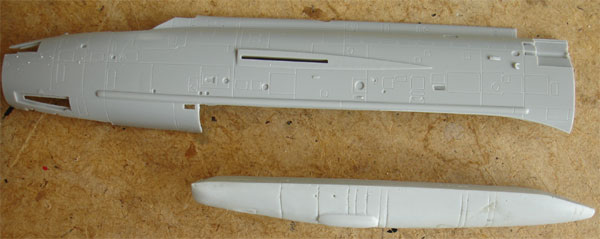
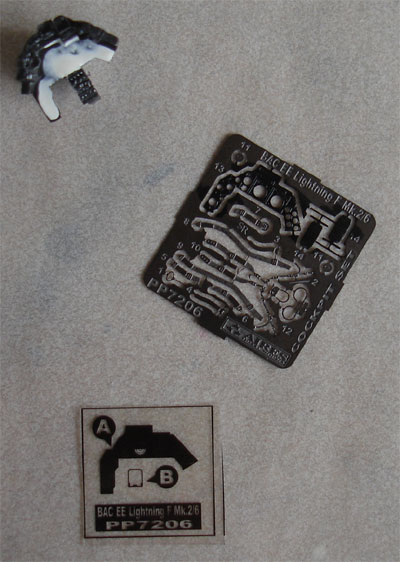
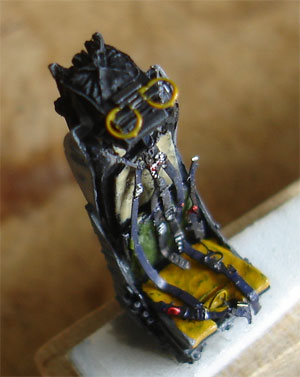
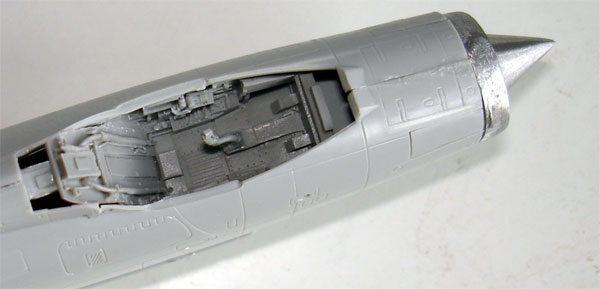
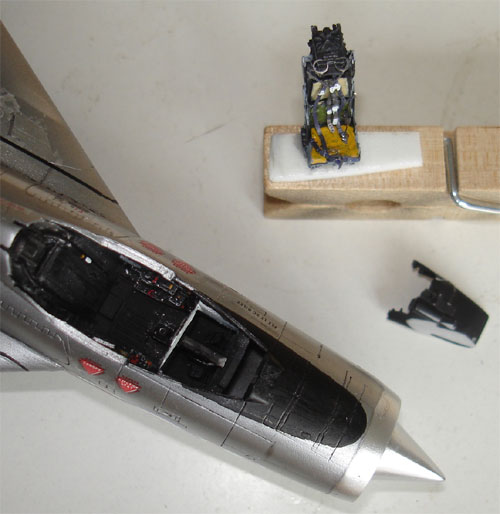
In addition for a finishing touch, I purchased a cockpit detailset 7206 from AIRES.I started with cutting off the rear
portion of the fuselage halves to cater for the replacement resin set from
HERITAGE.
Also, this was done for the resin
belly fairing area for the other HERITAGE set.
The AIRES cockpit set was assembled
as per instructions.
 .
.
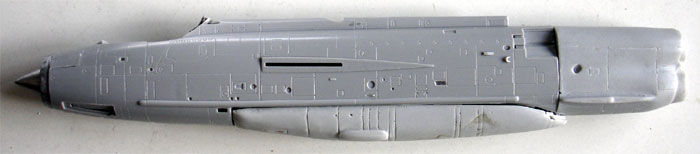
After fitting all the internal subassemblies,
the plastic fuselage was assembled. Do not forget to add sufficient weight
in the nose to avoid a tailsitter.
Than came the rear exhaust fuselage
area after making sure that the mating surface is perfectly flat and at
90 degrees angle. I used small metal pins between the vertical fin and
the (resin) rear fuselage, drilling holes and fitting these for better
strength.
I had to close some moulding inaccuracies in the HERITAGE resin part tailpipe area. These tiny gaps were closed with superglue and baking soda and scalpelled in shape. The belly was also put in place.
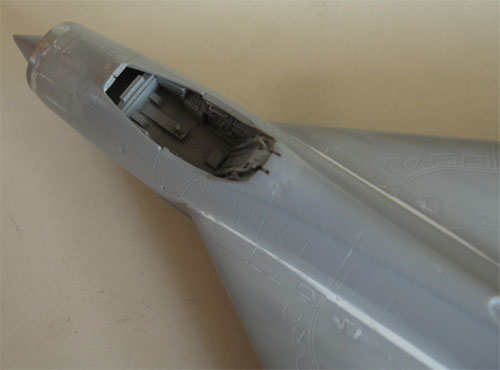
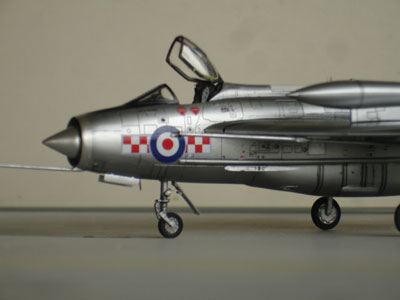
The nose cone bullet was supplied
in the AIRES set in metal as well, and this fits after a bit of trimming
into the Trumpeter intake ducting.
 .
.
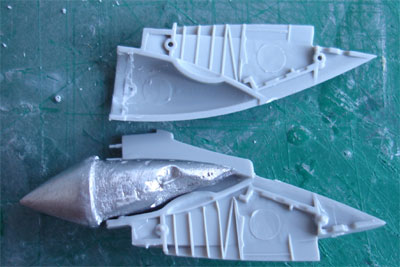
You also get a very nice metal ring
for the intake which is far better than the one in the kit. It needs putty and sanding to get a good fuselage fit.
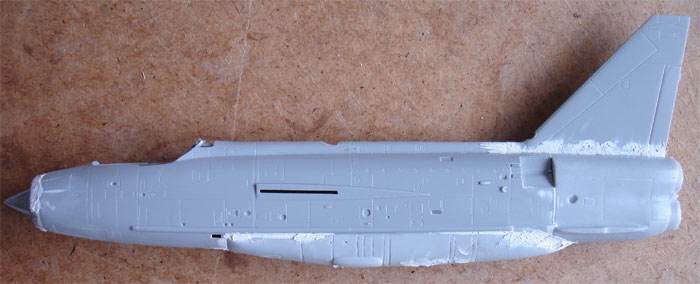
All fuselage seams were filled and
smoothened with wet sanding. Try to avoid scratches as much as possible
as to avoid lot of polishing work because of the gloss metal surface finish
later on.
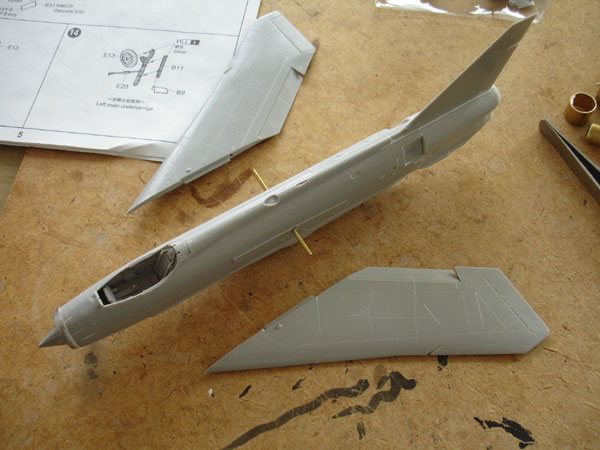
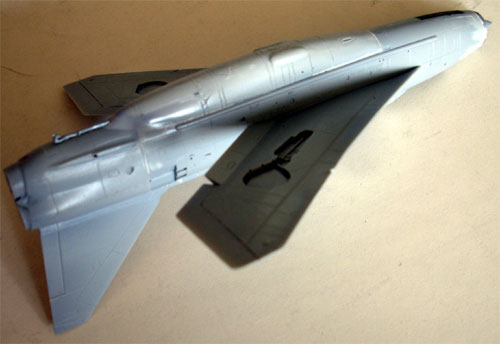
Next came fitting the wing halves
and other parts. I added a spar from metal rod to get strength between
the wing halves and the fuselage. I left off the ventral fins and rear
horizontal stabilizers for later.
For the stabilizers, I again drilled
two small holes to fit a metal linking pin later on for better strength.
Now it was time to fill any remaining small gaps. I had to fill also a
gap at the base joint of the vertical tail, and the link was strengthened
as well with a linking metal pin which fitted in an open drilled hole in
the rear resin part.
I needed some putty in the wing-fuselage
junction.
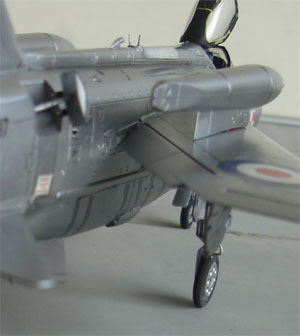
The kit ventral fins below the tail were reduced in length.
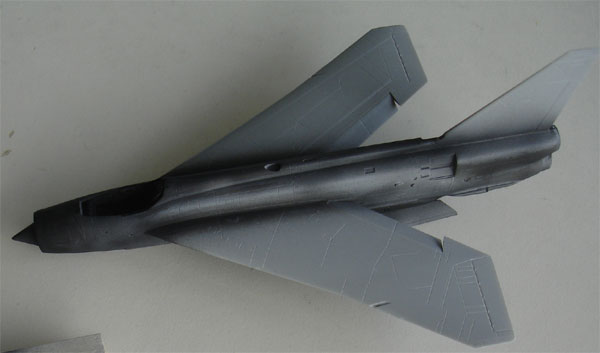
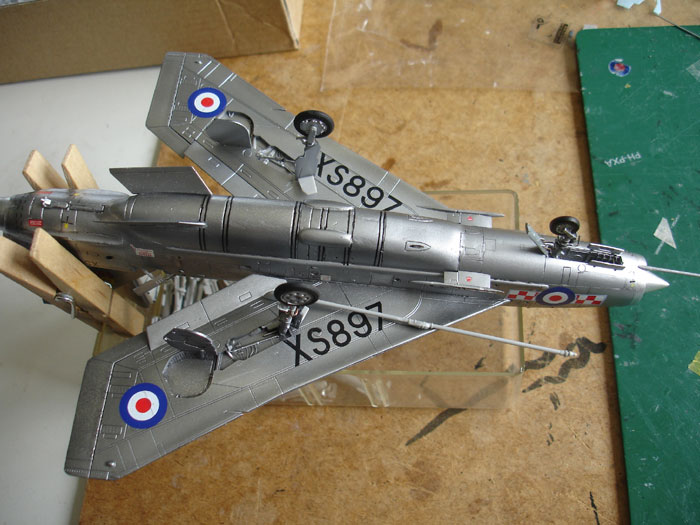
The model was ready for a first paint
layer. The landing gear and smaller bits and obviously also not the canopy
were not yet fitted. After a satisfactory result, the overall model was
given a coat of light grey base coat to check for any flaws with the airbrush.
Some small corrections were made with putty and the corrected ventral fins
fitted, filling gaps with white glue.
The overall shiny metal finish was
to be accomplished with ALCLAD II.
So the model was given a coat of black followed with several layers
of Johnson Klear/Pledge gloss varnish
to get a perfect gloss undercoat for the ALCLAD.
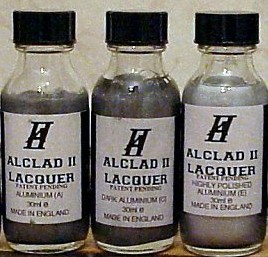

PROTECT YOUR HEALTH when airbrushing ALCLAD!
This was also done for the smaller parts to be fitted later such as gear doors and stabilizers. Next came a few coats of ALCLAD II colour Highly Polished Aluminium which came on nicely.
The rear fuselage ring at the exhaust, the intake ring and some smaller panels were given a slightly different sheen of ALCLAD II Aluminium. I avoided masking and simply used post-it paper with cut out holes. The main model now had its colour coats.
It was decided to put on the decals with markings at this stage before fitting the vulnerable nose gear and main gears. I opted to use decals for a Lightning F6 from RAF Squadron no.56 based at RAF Wattisham around 1976 from MODELDECAL set 99. This has very nice markings. The roundels came from an XTRACOLOUR roundel decalset.
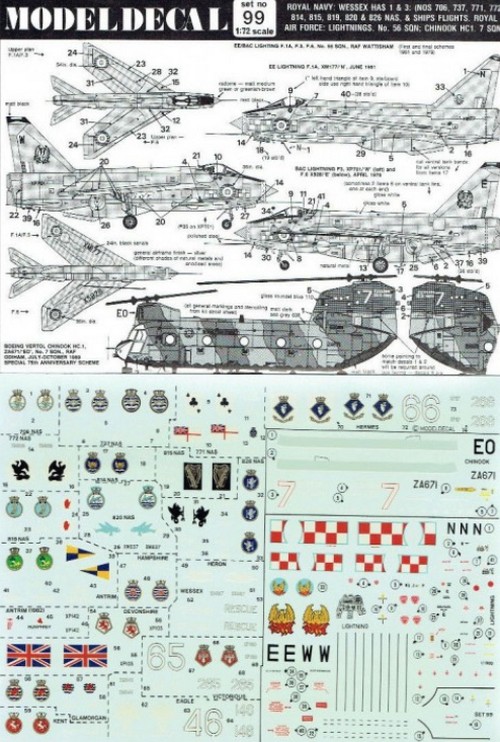
During application of the upper wing walkways, I found the Trumpeter decals to be a bit flimsy with non-consistent thickness. The kit RAF roundels colour are incorrect. I used striping from a stripes' decalset. The moving canopy edges have yellow bits as well and these were painted.
Some bits were painted with brush
to complete the model.
A small gun sight was added from
thin clear plastic.

The model was finished by fitting
the remainder of the parts. The main landing gears were set. The stabilizers were fitted with
a metal linking pin from a paperclip. The windshield
needed a tiny bit of white glue to close the gaps and some fine retouching
with a fine brush.
Now, a little bit of wash was applied
to the moving surfaces gaps, some panels and bits using ready to apply
wash from PROMODELLER #003 with a fine
brush. After drying, the overall model was given a gloss coat of Johnson
Klear/Pledge to protect the decals and get an even overall gloss shine.
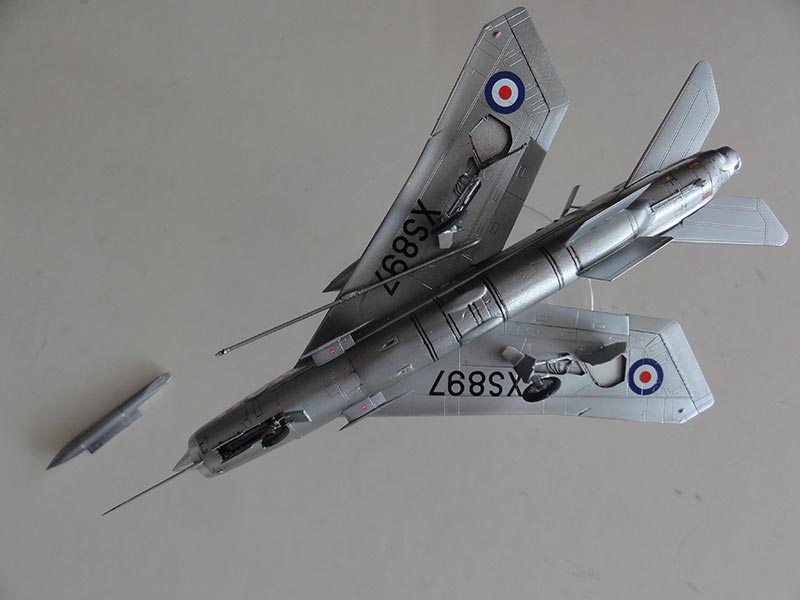

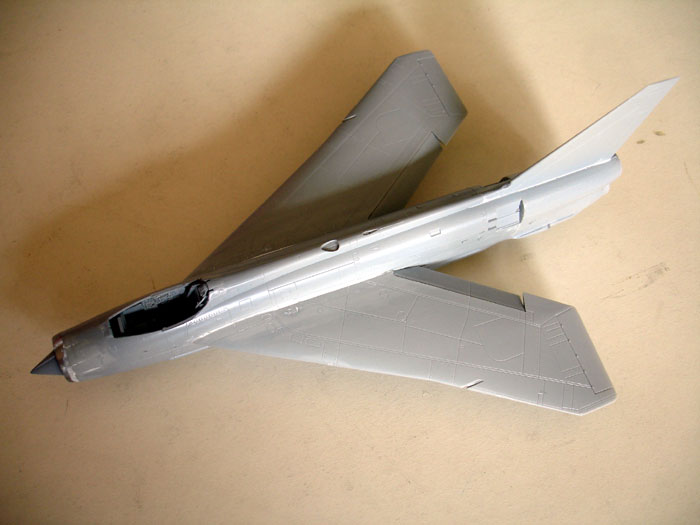
The upper wing tanks were fitted
as well as this is a very special feature of the Lightning.
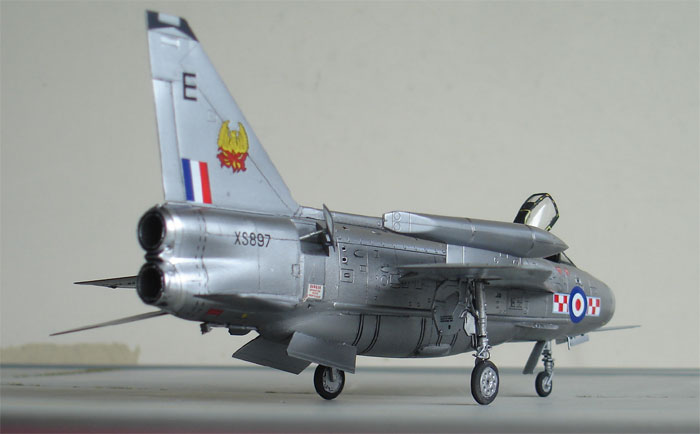
The rear air brakes were also kept
open.
 .
.
Note small antenna's on the spine.
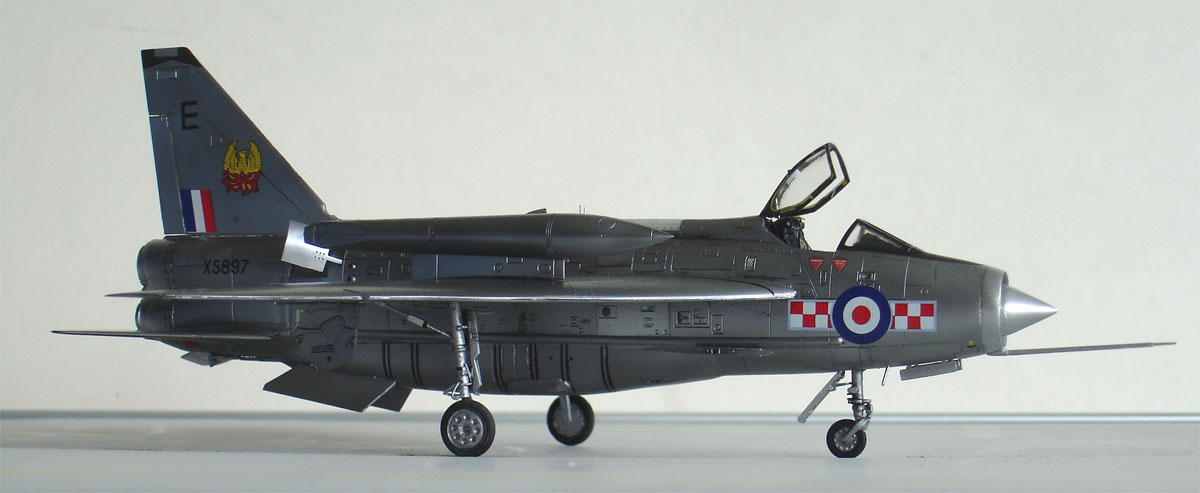

Lightning F6 , XS897 c/n 95243 .
NOTE: a single small mirror was fitted in the centre of the open canopy: this is not yet seen on the pictures.

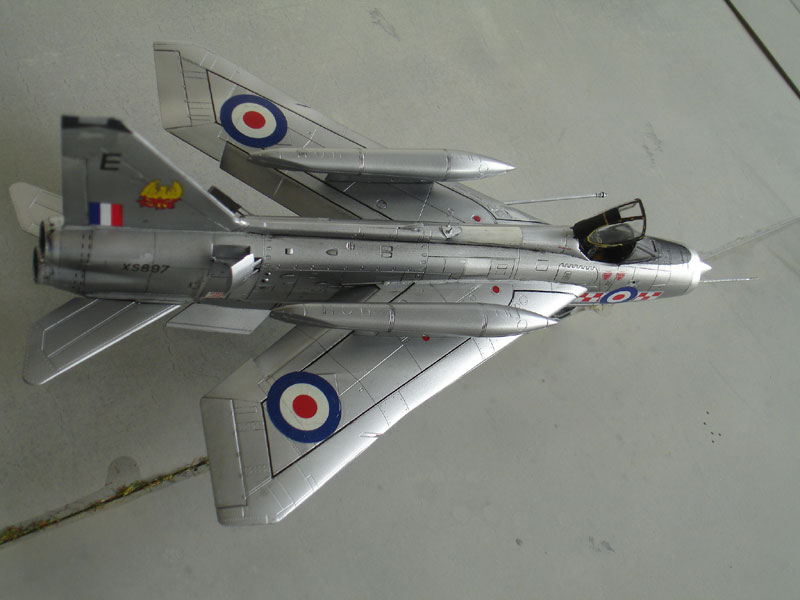
Also note the black walkways.

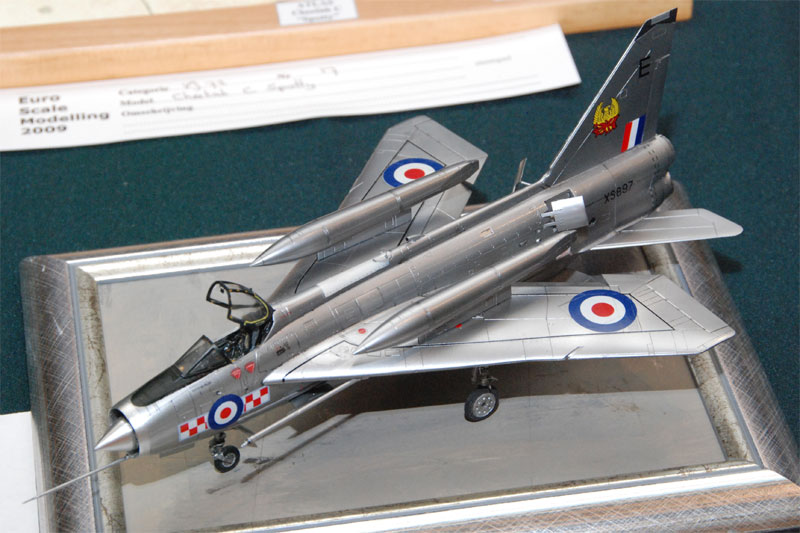
on a display at a show
Tip: if you want a Lightning F6 in 1/72, the Airfix kit is a better choice.

(c) Copyright Meindert "designer"/ All rights reserved. Your comments are welcomed by webmaster
Created this page October 28, 2009