1/32 scale Revell
[ Page 3 ]
1/32 scale Hunter mk6. of Revell kit
.... continued from page 2...
.
After the colours were applied, the overall model got a coat on Johnson Future gloss coat. This will prevent silvering when adding the decals. Another trick when applying the decals is to use Johnson Future as "glue" by sliding the released decal through an amount of Future holding it with tweezers.
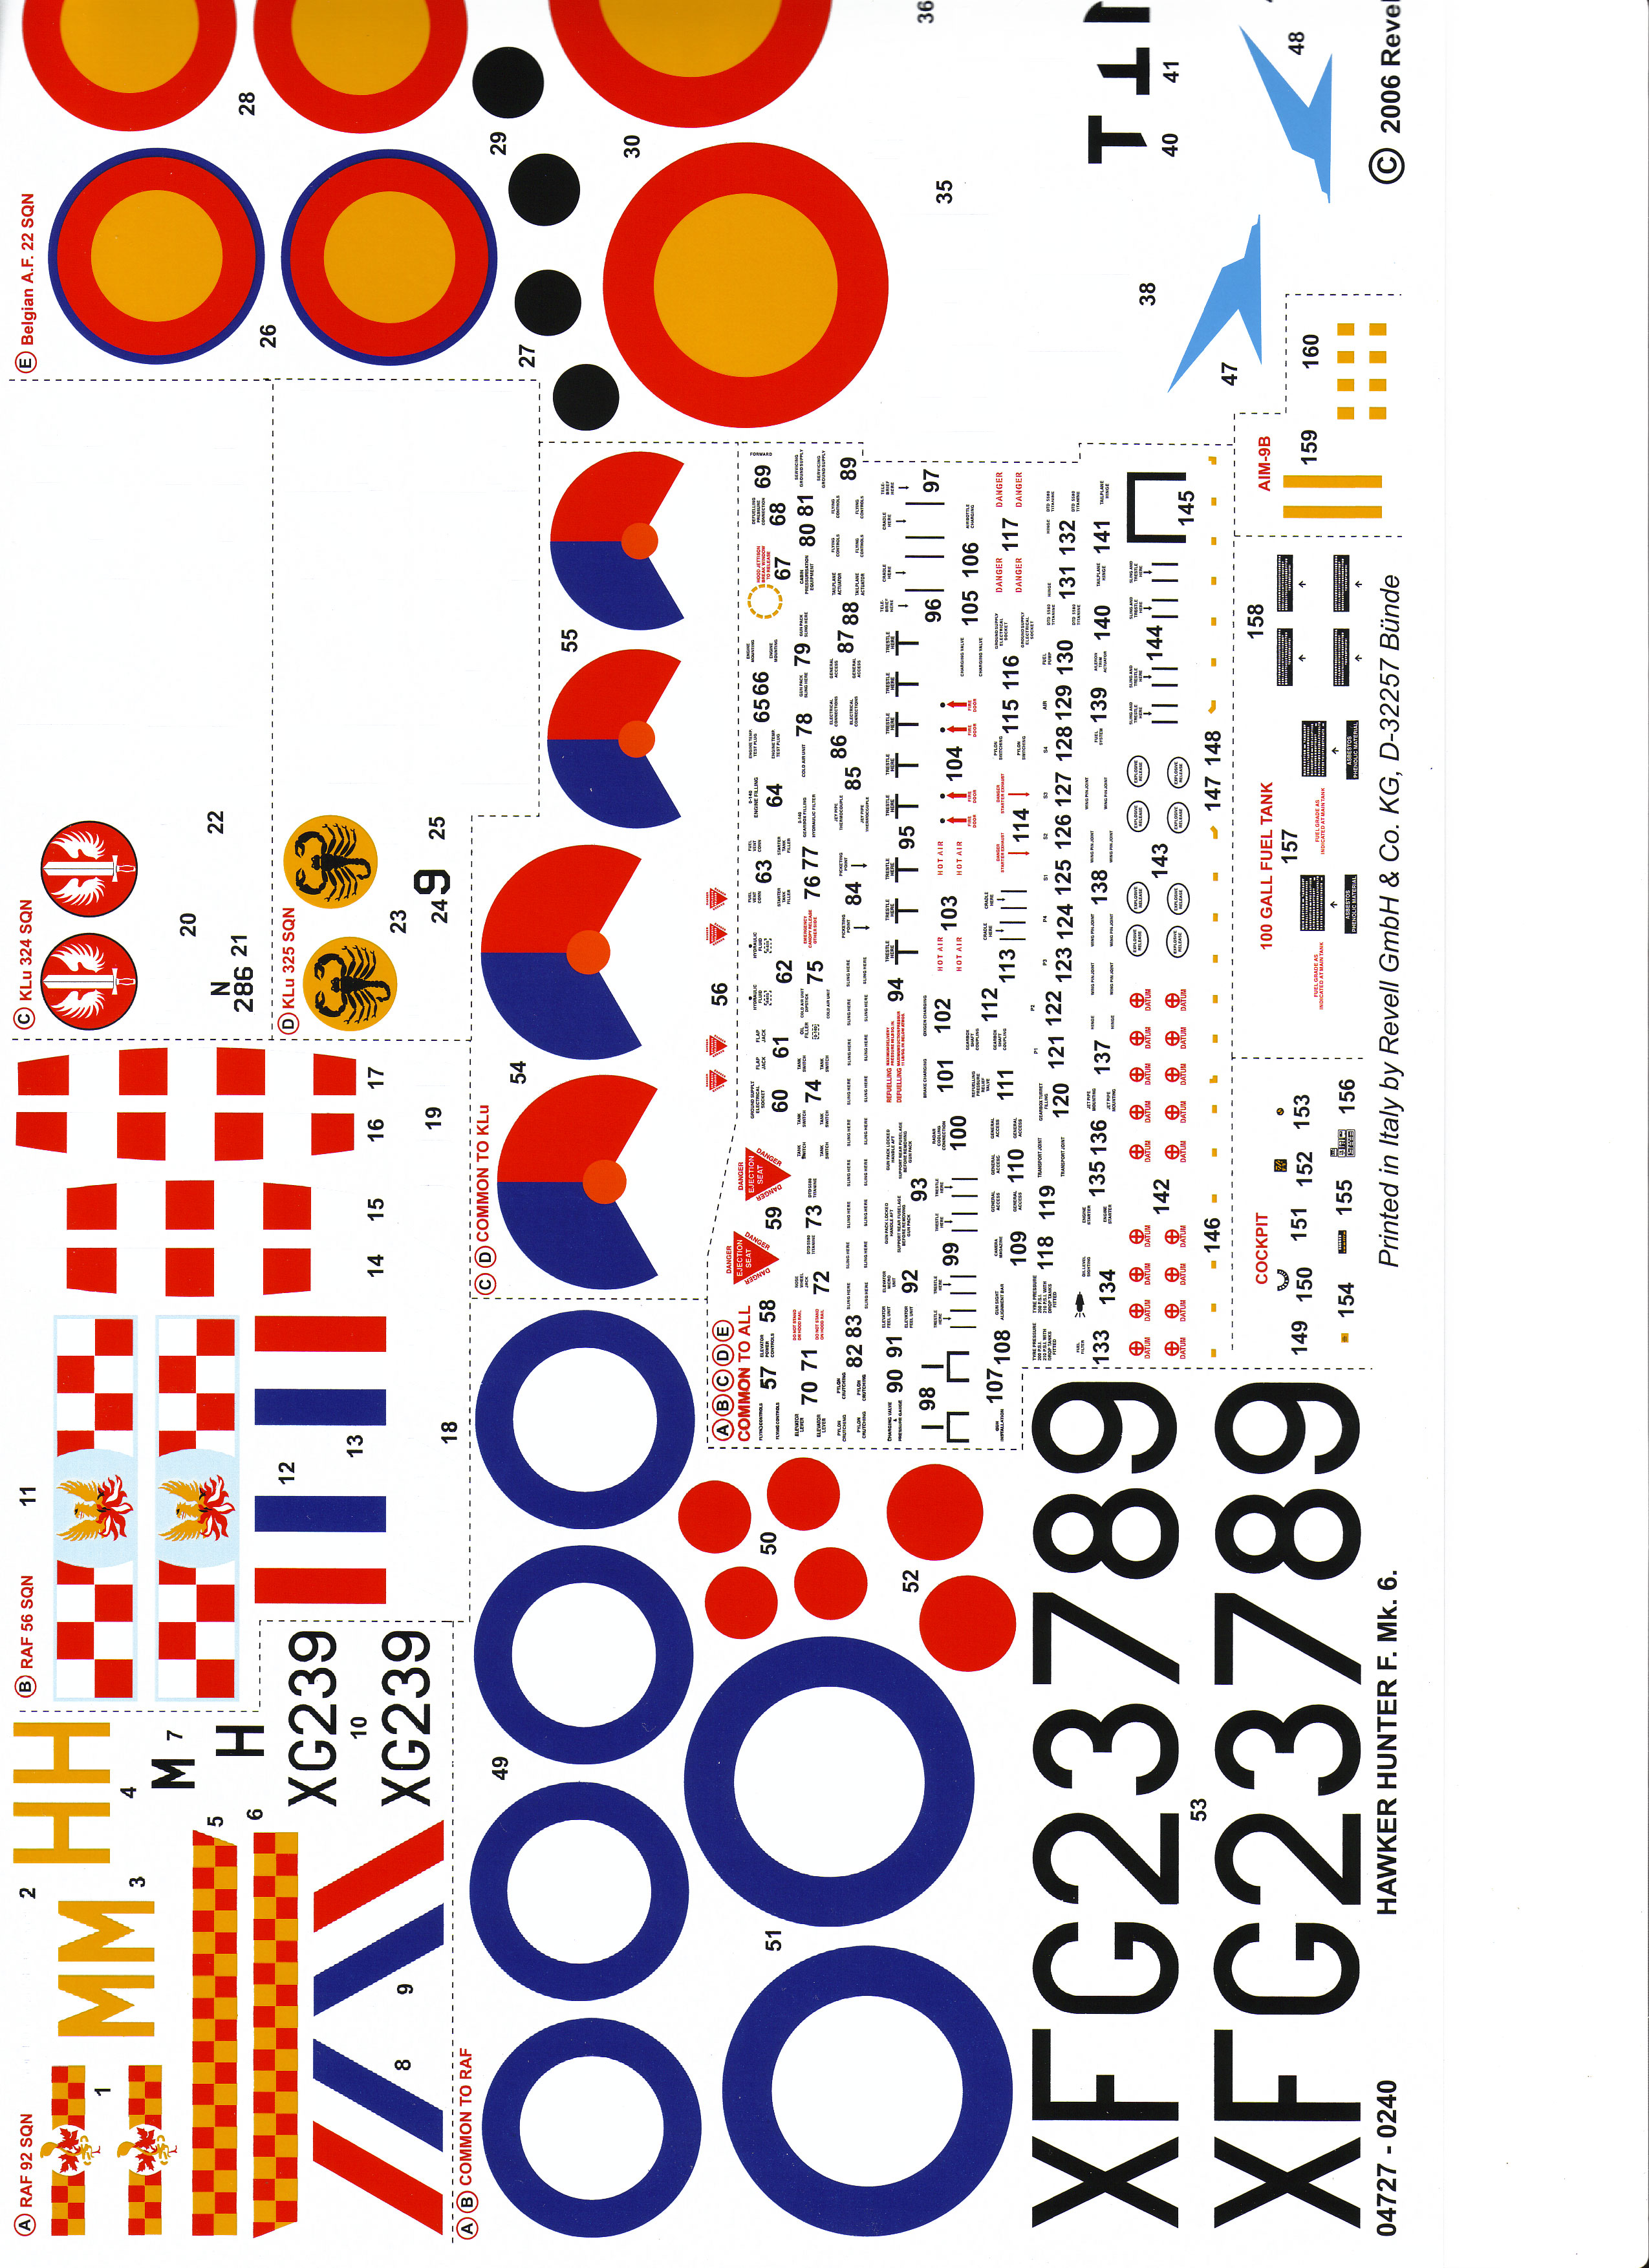
Revell also provides in this kit their usual very high quality decalsheet. There are hundreds of decals! The markings and stencilling are all there. It took me over 2 days to get the appropriate decals in place on the model, but the result is worth it.
For this model, the decals came for 70% from the Revell kits (especially the stencilling), 20% from a Dutch Decal set (mainly the numbers and roundels) and 10% from other decals (like the Echelon Hunter sets).
Please note
the decalnumbers #xxx differ between the different Revell Hunter kits.
You find however many similar stencilling symbols.
Markings mk.6
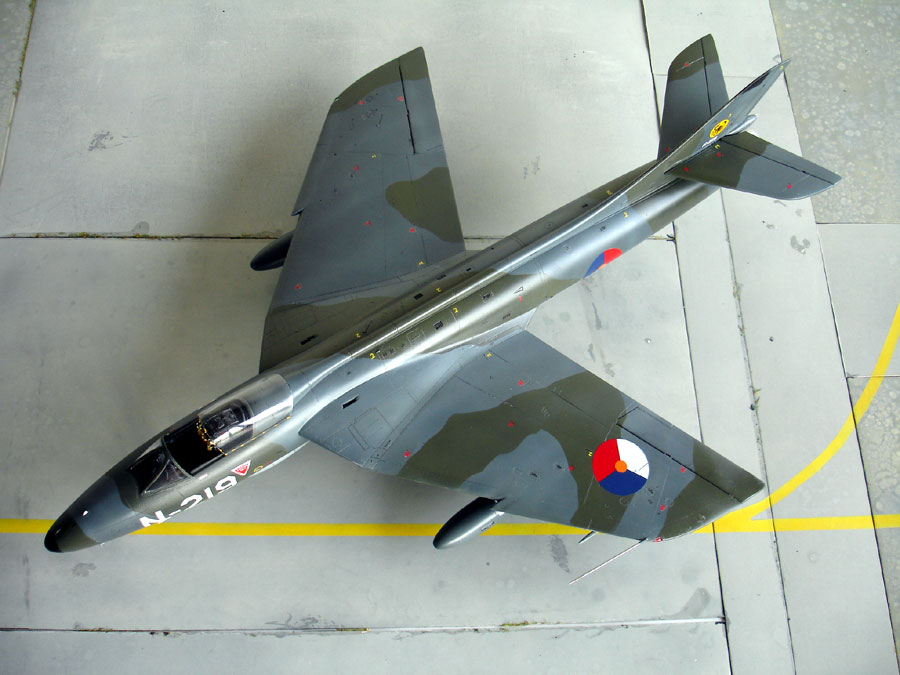
Dutch AF markings for the Hunters after April 1960 including the mk.6 consisted of roundels in 4 positions. The 2 wing roundels were smaller at 90 cm and the fuselage roundels standard 75 cm.
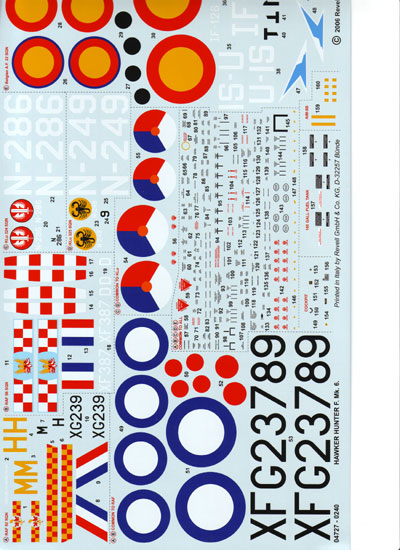
The decals
are shown here:
F6
decals part 1 (with backing paper colour removed; you won't see the
white details)
F6
decals part 2 (with backing paper colour removed; you won't see the
white details)
The Revell mk.6
kit provides excellent decals for the smaller stencilling but the Dutch
AF roundels are too light blue. The roundels were replaced by decals from
Dutch Decal set #72029 . The Hunter markings came from
the Dutch Decal set #32004.
When you use the DD decal roundels,
carefully trim with scissors their edges otherwise you will end up with
nasty white edges!
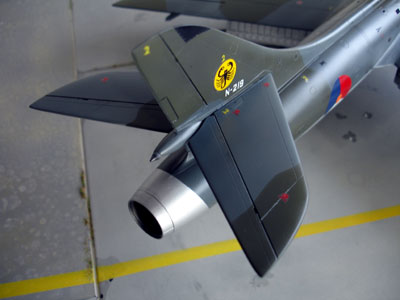
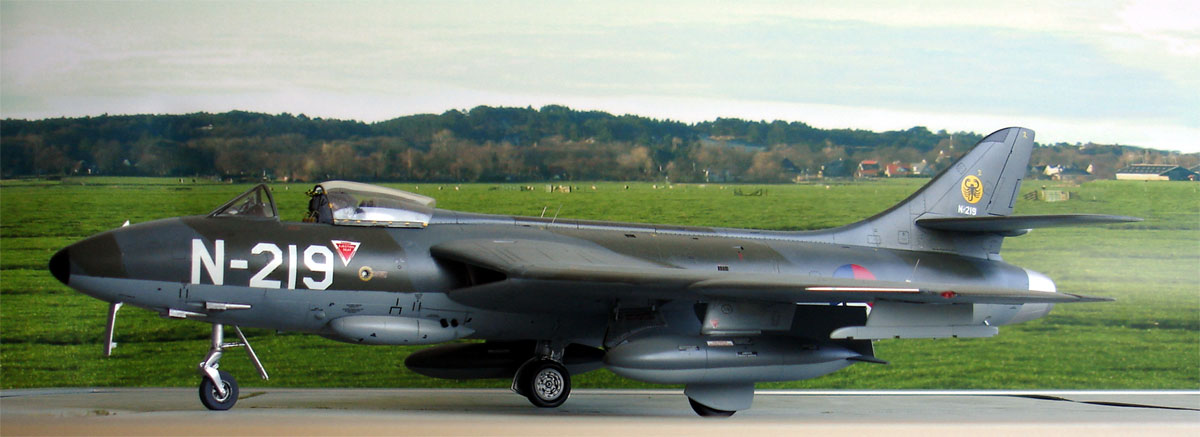
A Hunter F.mk 6 of RNETh AF 325 squadron , code N-219 is depicted .
Not all Revell
kit mk.6 smaller stencilling are correct for Dutch AF Hunters.
On Dutch AF
planes, the "lift" symbol #83 was not used, but another yellow symbol looking
like a ?. These
markings were obtained from the Echelon kit decals, but you should be able
to find them also on other decalsheets as they are the standard NATO symbol
(also the Revell Hunter FGA9/mk.58 kit, its decal #105 is the correct one)
.
STEPs 24 up to 35.
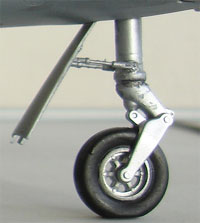
It is no problem to assemble the kits undercarriage and no modification was needed.
As noted before, some of these parts were already aluminium painted. The moulded flattened tyres are a bit exaggerated though, but I left them as they were. Note that the tyres should be vertical on the ground. So do not fit them on the legs yet, but leave off. I had to enlarge the aixle hole a bit.
First assemble the gears without their wheels.
When dry, fot the wheels to get a perfect horizontal and vertical fit.
STEP 42
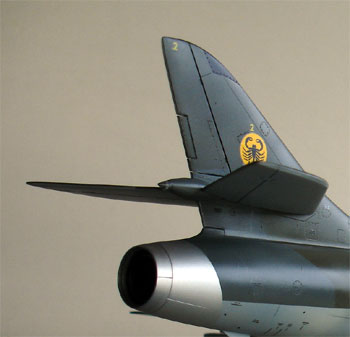
Fit the tail light. It needed some
sanding at its base to get a good fit.
Also the wing tip lights were added and tinted with transparant RED and GREEN with Tamiya transparant acrylics. The parts needed some trimming as they are a bit too large. Add some Kristal Kleer to get a good smooth result.
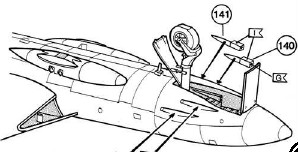
STEP 53
Gungass deflectors of different shapes
are seen on most mk.6 Hunters. The Revell parts #139-141 may be used. I
painted the "grills" on the lower flat areas. Make sure not to mix up the
outboard and inboard deflectors.
From STEP 23, the horizontal stabilizers
were fitted that had also been airbrush. The fit was not perfect! I had
to thin down the lips and add some white glue to suggest there is no gap.
![]()
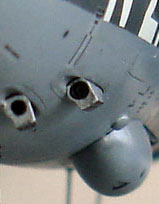
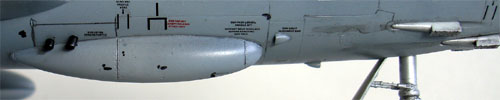
Weatering
and panelline details
I now did some weathering using acrylic
paint of Revell of their new range of acrylics.
Used were the black, dark grey and silver acfyllics. These were heavily
thinned with car window washing anti-freeze fluid
bought at the department store and applied with a very thin brush. Wipe
off any excess and do NOT overdo it!.

This works perfectly! Also the wheelbays
were not forgotten.
Here you see some added detail with
this technique in the sabrina area..
STEP 46
The pitottube was fitted now; if
you can, replace it with a metal needle. It is not clear why Revell indicates
to close the outboard missile pylons gaps; you will need these when you
fit these pylons.
![]()
FINISHING
UP
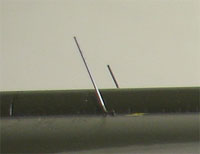
The Hunter has
numerous small antenna's:
- 2 rods at
the belly (using the parts #82)
- VHF wire
antenna's, made from thin metal wire: 2 on wing tips and 2 next to the
fuselage spine. (their bases were painted in the appropriate colour). 1
VHF antenna is on the roundel!
 spine
spine
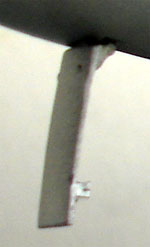
Also, I found
that on the forward nose gear door there are visible lock mechanisms. These
were made from thin card.
 ..........
After a total
clean up, the model got a semi-gloss overall coat of Johnson
Future mixed with some Tamiya matting agent. This give the overall
model a very nice sheen.
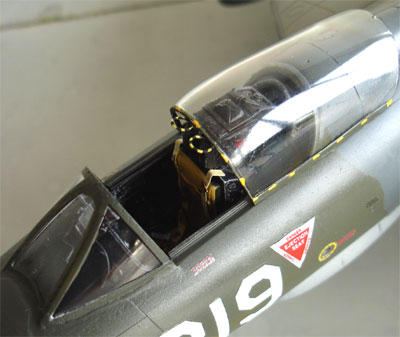
The ejection seat was already almost finished and it was painted mostly black and safety harnesses added. A little drybrushing highlighted the smaller details. For the F.mk6 the ejection pull rods were painted yellow with black striping.
And than finally: the ejection seat was put into the cockpit and the canopy fixed with a tiny drop of white glue on its lower edge.

the striping on the canopy and details
The outher ring of the exhaust pipe
got a coat of thinned black to suggest this hot end.
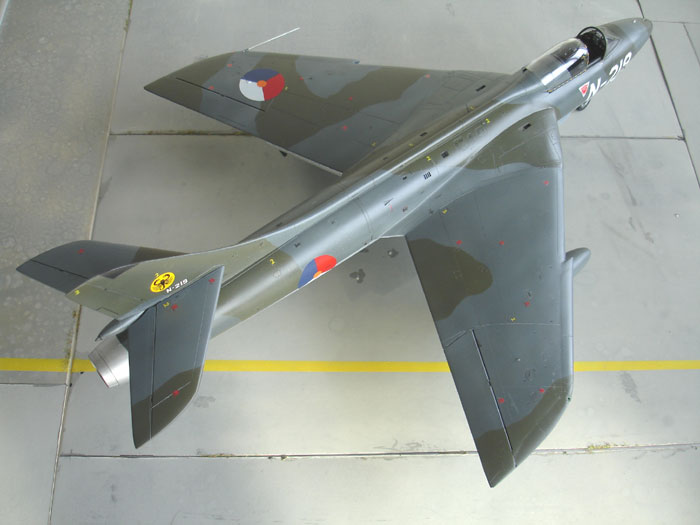
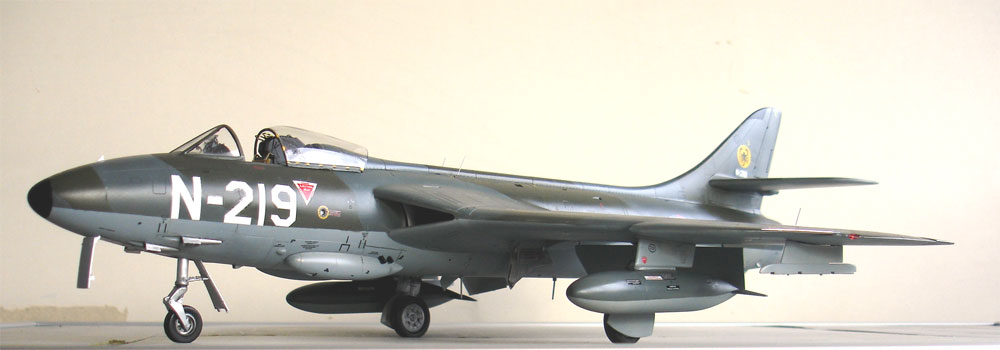
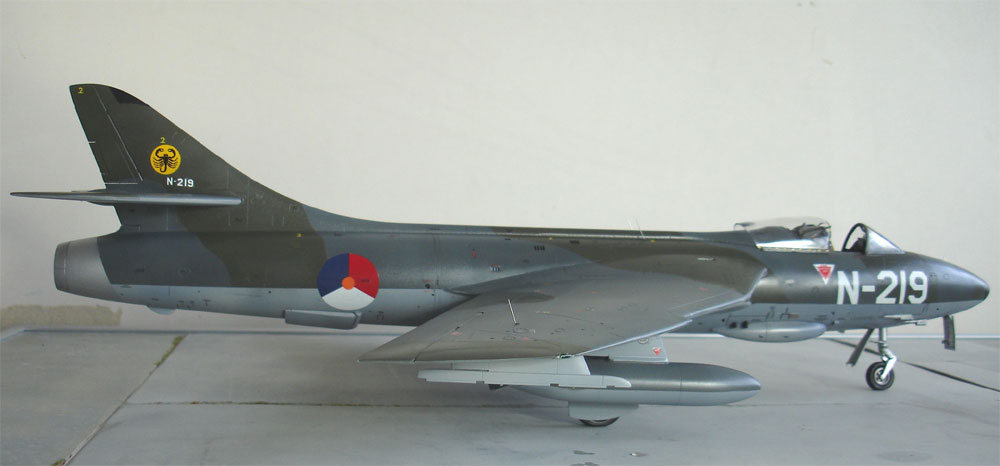
Hawker Hunter F.mk 6 of RNETh AF 325 squadron , code N-219 as based on Soesterberg AFB around 1965. It entered service in 1958 at 324 squadron and was sold to Hawker mid 1968.
This Hunter F.mk6 looks as if it is ready for take off!
Back to Hunter main page
Back to 1/32 Models.......

(c) Copyright Meindert "designer"/ All rights reserved. Your comments are welcomed by webmaster
Created this page
February 11, 2007