|
Showing the 1/32 kit of the Gatling gun would be nice, so the gun was assembled.
Trumpeter provides nice basic parts. Only limited extra detail is needed
and in the gun bay some holes were drilled and the ammo belts from the
kit were also used.
The single gun
bay door part # J41 was cut into three bay doors and these required opening
up their cooling slots and some added details inside. I also assembled
the gun ammo drum, but it will not be seen.
The central fuselage
bomb bay was not used; if you want to use it you will need to cut out the
bay doors from the kit. But two extra replacements parts # A3 & A8
are supplied, a good thought by Trumpeter.
The
kit has excellent
transparent clear parts for lights.
The fuselage comes with an anti-collision
light on top. The fairing was a bit large, so sanded off. The gap was closed
with putty, the light to be added later (part # H1).
In the vertical tail fin, two slots/
gaps were made under the fairing for the top light.
The kit comes
with separate slats and flaps. Very well done. The wings, tail fin,
elevators and aft fuselage where used as as supplied and need no extra
work. I left out the metal pins and parts for movable flaps and slats.
The loose slats and flaps will set well in place and although it is nice
that Trumpeter wants to give these movable options, it makes things a little
complicated. You don't need them!
The kit was further
assembled. Only gaps for filling found were at the wing-fuselage roots,
the radar cone to be set in place and closed and the vertical fin. To prevent
amounts of sanding and later clean ups, I used the trick of putty and nail
polish remover.
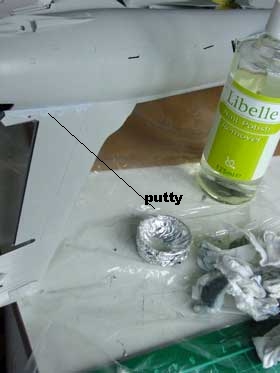
Set Tamiya
fine Putty into the gaps and let dry for two hours. Next, remove
excess putty with tissue dipped into nail polish remover. It will remove
the excess putty without scratching: no clean up of scratches needed as
you do not need to sand! This trick will help with all small gaps on any
model where you need no parts/area "build ups" .
As I want to finish this kit in metal
finish, this will help a great deal! Metal is very sensitive to small scratches
in the plastic, otherwise lots of polishing would be needed.
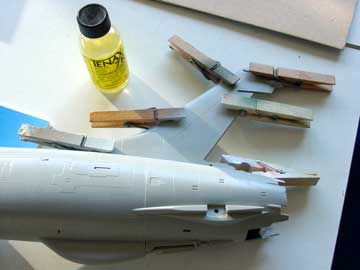
Overall assembly
just took a week! This kit is excellent as stated before and a real pleasure
to make. For glue, in some areas fast setting Tenax was used. Ventilate
your workplace well!
 tail
assembly tail
assembly
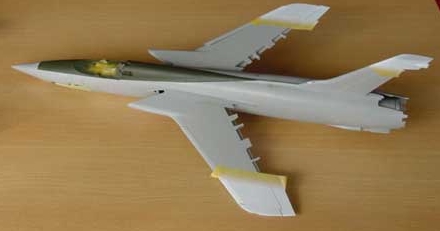
The model of Trumpeter
comes with huge amounts of "stores".
You get five sprue sets of Mk-82 bombs, Mk-117 bombs, various Napalm
tanks, 2 ECM pods, and centre and 2 wing fuel tanks. These are all excellent
and can be used. All pylons are also supplied and the kit comes also with
Shrikes, Standard missiles and these typically represent the stores
of the "Thud".
Trumpeter kit comes with “Two Bobs”
kit decals , they are very good with options for the 561 TFS and the 17WWS
during Vietnam War as based at Korat Air Base, Thailand. Both schemes are
of a camouflaged USAF tan-green-light grey scheme.
I opted for a different scheme, many
metal look Thuds were present flying around in the fifties and up to say
1967. The Warpaint book illustrated a very nice F-105D
of
the 563 TFS of 23 TFW with red-white
stripes at the ends of wing and stabilizer and an overall metallic finish.
The unit operated from Da Nang in Vietnam in 1965. The model in this finish
and scheme can be made using various spare decals and spraying the red-white
stripes. No after marked decals are thus needed.
UPDATED NOTE:
on this real F-105D picture you see no tiny cable spine between fin and
forward fuselage op top. So I forgot to remove this from the model! So
if you want to make this version, remove the spine!
On the
next F-105
page [3]
|

