[ page 3 ]
1/32 scale Eurocopter EC-145 REGA
... continued from page 2...
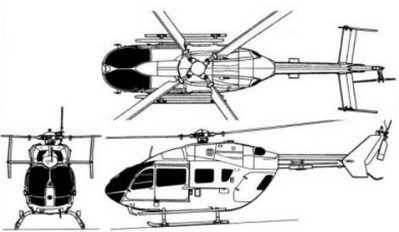
The twin engined BK-117 C-2 developed bij Eurocopter and Kawasaki in the 1990s got a longer and thus bigger cabin as compared to the EC-135 and was rebranded EC-145. The cabin could accommodate up to 9 passengers excluding the pilot and observer. The new larger type can be recognized quickly as it has an extra window on each side behind the sliding entry doors.
The EC-145 T1 had a conventional tail rotor of 1,96 m diameter but later versions got the fenestron layout. The engine is a pair of Turbomeca Arriel 1E2 and main rotor diameter 11,00 m.
 <T1
<T1Many companies use the EC-145. Such as the Swiss REGA for rescue and medical assistance.
The EC-145 was further developed into versions with the Fenestron and later as Airbus H-145. Read more on page 1...
Page 2
Revell Germany is the main supplier of nice helicopters scale model kits particularly in 1/32. Kit #04481 was for a EC-145 T1 with conventional rotor layout of the ADAC Luftrettung GmbH. Kit #04492 is similar but has decals for the Swiss REGA rescue and medevac version.
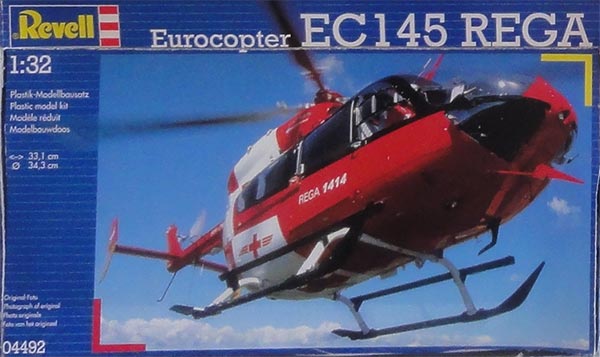
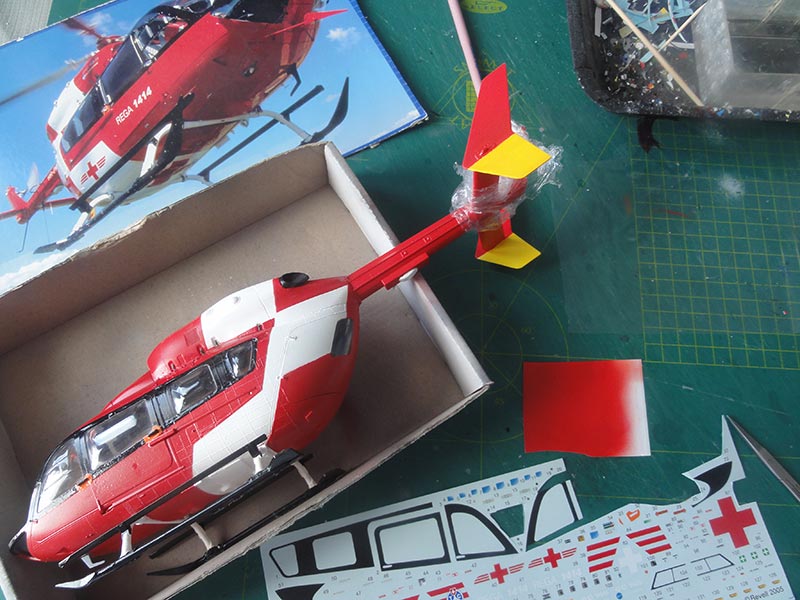
The box art shows a real REGA helicopter in a spectacular paint scheme.


These kits have the old style T1 tail with conventional tail rotor:
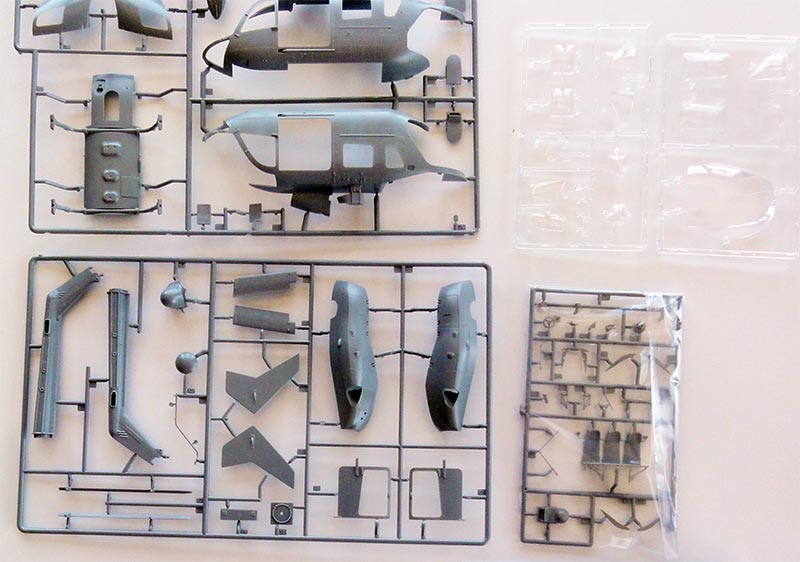
Other releases were kit #04648 released in 2010 for Medstar in Florida and German Polizei. Kit #04897 was for German DRF Luftrettung and kit #04927 is for a military U.S. Army UH-72A Lakota. These kits have many common sprues with parts but also often a different sprue for e.g. troop seats and medical equipment parts.
(The Revell kit was also developed into a H145 T2 kit based on the same EC-145 kit but with a few new sprues with extra parts enabling a later Fenestron tail. Read more on pages 1 etc.... )
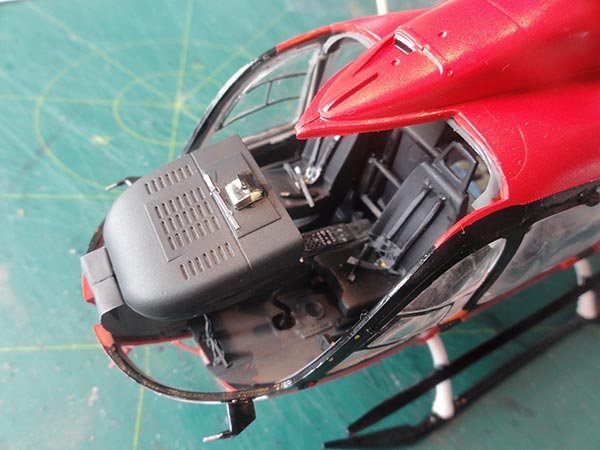
As I had used many parts of the medevac interior for the ANWB H145 helicopter, it was decided to keep the REGA interior simple and all cabin doors closed. This also means that not a lot of the interior can be seen through the cabin windows. The sliding cabin doors #68 and #71 were installed in the fuselage halves at the beginning of starting the assembly. Some slight sanding on the edges is needed to get them to fit flush. See instructions STEPs 31 + 32.
The fuselage halves are difficult to close with the interior installed. I simply removed some plastic at the edges of the floor #1 and ceiling #26 so it will fit without putting to much pressure.
Fortunately for the REGA Revell supplies the black window borders as decals, so the kit painting will be eased later on with the complex livery. So, contrary to earlier builds, no real outside surface pre-painting is needed prior to joining the fuselage halves.
This kit has very nice interior side panels but the cabin windows need to be installed from the inside so BEFORE closing up the fuselage halves.

The REGA interior was made as per kit. In STEPs 2-5 it was assumed that both control sets are installed in the REGA EC-145 such as pitch, collective and other controls.
(I forgot to make photo's).

(note: I had painted a base coat earlier on the fuselage halves but this is thus not really necessary at this stage).

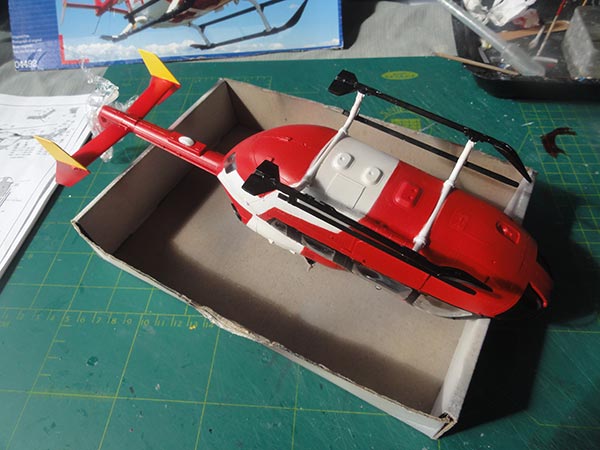
The main assembly was now done. Use clamps and let dry when the fuselage halves have been joined.


Before fitting the skid part #49 in STEP 25, add at least 30 grams nose weight below the cockpit floor to avoid a "tail sitter". This REGA EC-145 has a standard skid type.

The engine compartment shown in STEPs 27-29 was assembled. Some putty and sanding the seam was needed. (The main rotor will not be set fixed to the model later on, so the rotor head assembly can be done later on).
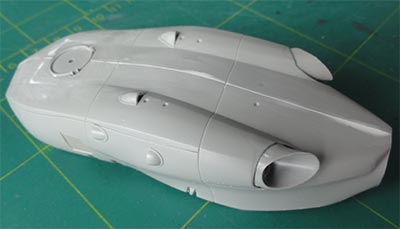

The transparancies / windows were roughly masked and than followed a base coat.

For this base coat Revell Aqua 75 steingrau "light grey" acryllic was airbrushed. As Aqua paints are very thick in their blue container, I always thin Aqua paints with a thinner of 25% IPA (iso propyl alcohol) with 75% distilled water. Thin in a ratio of thinner 1:1 paint.

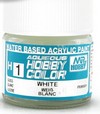
The REGA has a spectacular white and red livery and this is a bit difficult to accomplish. So first a mat base white coat was airbrushed, this will make covering the paint easier. Any white paint can be used but here Revell Aqua 05 weiss, than followed by a gloss white coat of Gunze Sangyo Mr.Hobby H1 acylic.
I also recommend to airbrush some spare decals in the same white:
as the model is covered by raised but very nice rivets as appropriate for a helicopter model at 1/32 scale. Than it is unavoidable that some "paint creep" will be there at edges: so red paint coming onto the white. Cut thin white decal strips can be used to repair this.

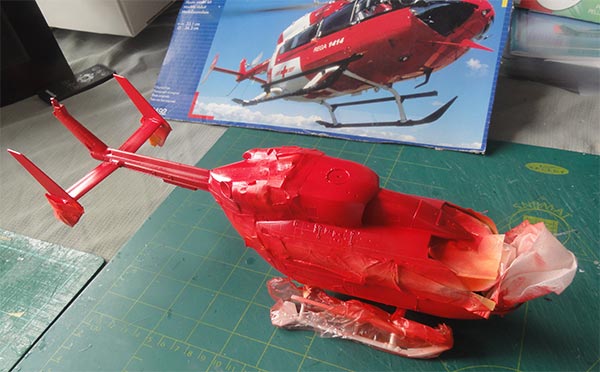
Masking takes a lot of time off all white surfaces with masking tape. Also, align carefully according to the complex REGA paint scheme. The Revell drawings are excellent and correct here to use as guide.
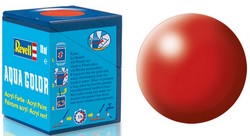
For the REGA red, I used Revell Aqua 330 Feuerrot. ("gloss red").
Also here, again airbrush a spare decal in red to repair later on any paint creep at edges.
The lower ends of the stabilizer end plates were masked, these were airbrushed Gunze Sangyo Mr.Hobby H329 approx. FS13538 yellow.
I needed still some "repair work" on white areas, so some masking again needed. Also, household plastic foil came in handy here. Strips of cut red decal were used as well.
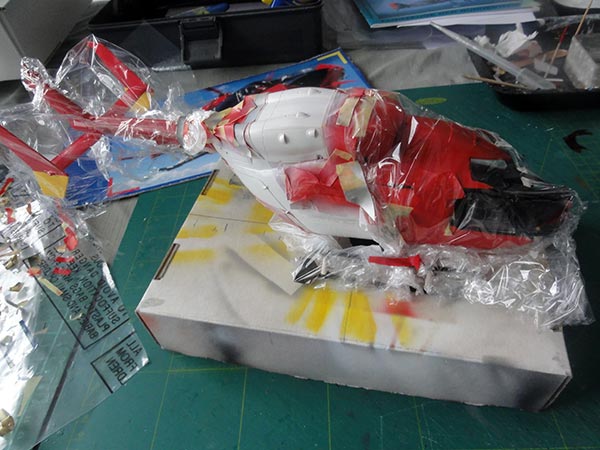
The skid legs were painted white and the horizontal bars gloss black. The black window borders were partly painted.
The masking tape was removed and some edges showed paint creep, so the extra airbrushed spare decals in both white and red come to the rescue here.
The Revell kit decals are very good. For the large RED CROSS on the lower fuselage and registrations on the tail boom, use a decal softener such as DACO decal setting.


At the exhausts, a black panel is also seen and is a nice decal.


When decalling was complete, the model got a gloss varnish coat with the airbrush with Johnson Pledge/ Clear acrylic varnish. Mask loosely off all windows.
The forward windows were now set using also Micro Kristal Kleer. The lower windows fit OK. But there remain some significant gaps at the large transparant window; not a lot can be done about that except filling the gaps again with Kristal Kleer.
The REGA helo has a hoist and this is nicely provided in the Revell kit as seen in STEP 58. The search light of STEPs 53-55 is optionable but was not installed.

The REGA helo also has the cable cutters #125 and #137, these are in kit.

The various smaller antennas were set and also a few extra small drain pipes near the skid from scrap.

The tail rotor was also painted, masked and set in place.

The fitting of the wind screen wiper in STEP 56 needs some care to ensure it follow the wind screen curves.

The main rotor has a complex paint scheme with also yellow bands and metal leading edges. This requires masking and I used a card board with pattern stripes on where these should come.
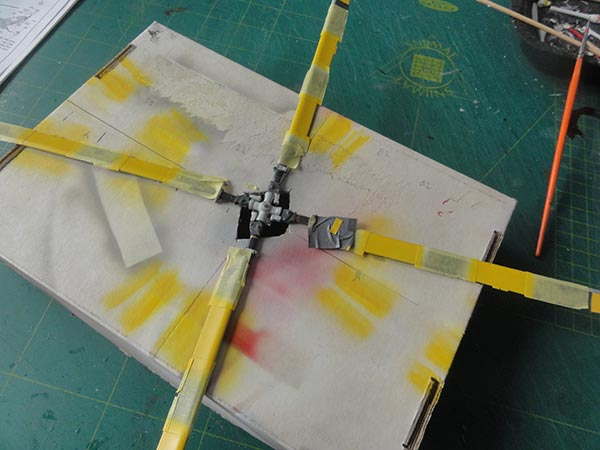
Each blade also has a coloured blade ID band red blue green yellow at the hub.

The lower rotor tips were orange, the upper rotor tips and bands yellow.

The completion of the model was now done with setting main rotor and hub but without fixing these with glue.
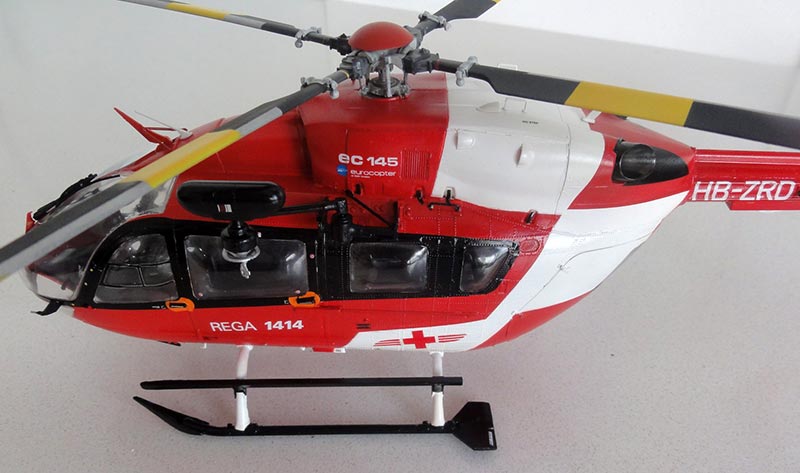
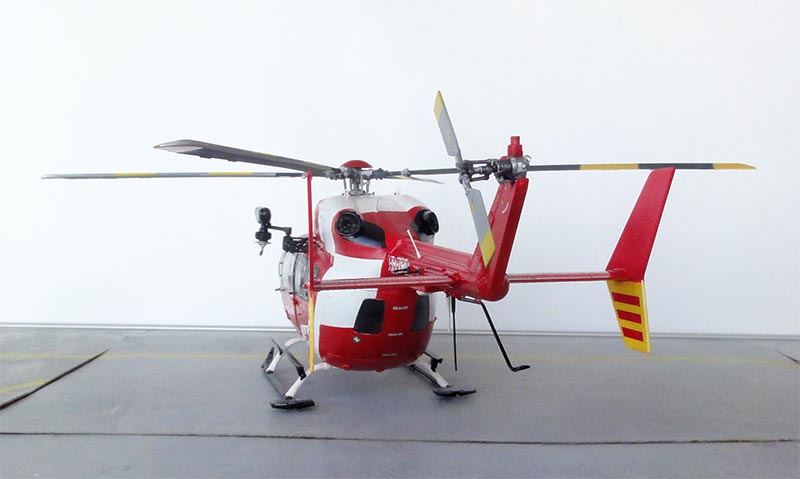
That completed a very nice looking model of the Swiss REGA EC-145 in 1/32 scale. A great Revell model.

 EC-145 T1, REGA, HB-ZRD


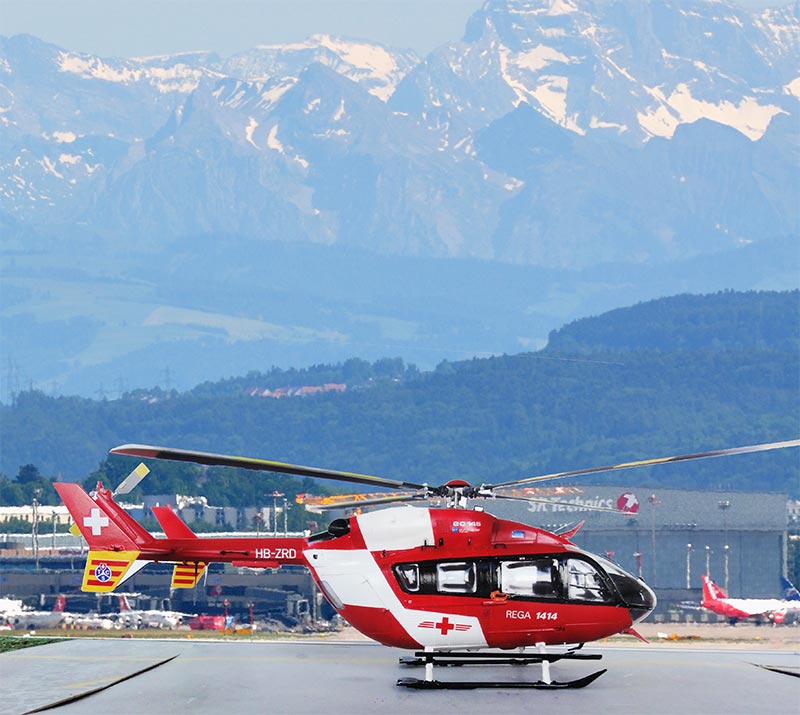
..... at Zurich
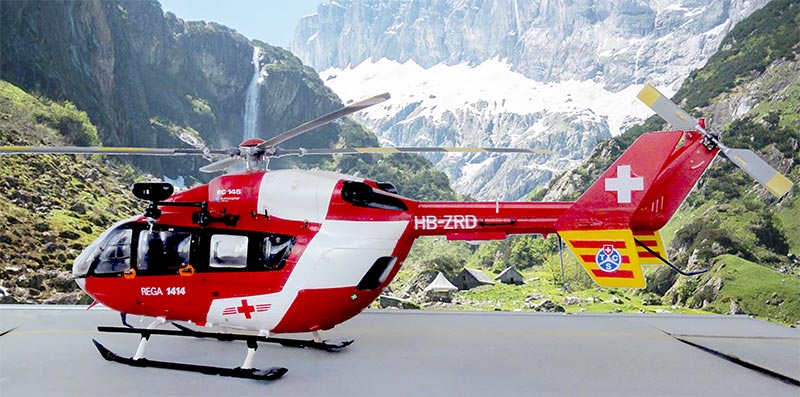

... in the snow
Back to 1/32 Models.......

(c) Copyright "designer"/ All rights reserved. Your comments are welcomed by webmaster
Created this page
June 9, 2023