[ Page 3 ]
Grumman A-6A intruder in 1/32 scale kit review & modelling report of the Trumpeter kit
Now it was time for the decals. The decal application was also done with the help of Johnson Future / Pledge to prevent silvering, the model getting an overall gloss coat with the airbrush.
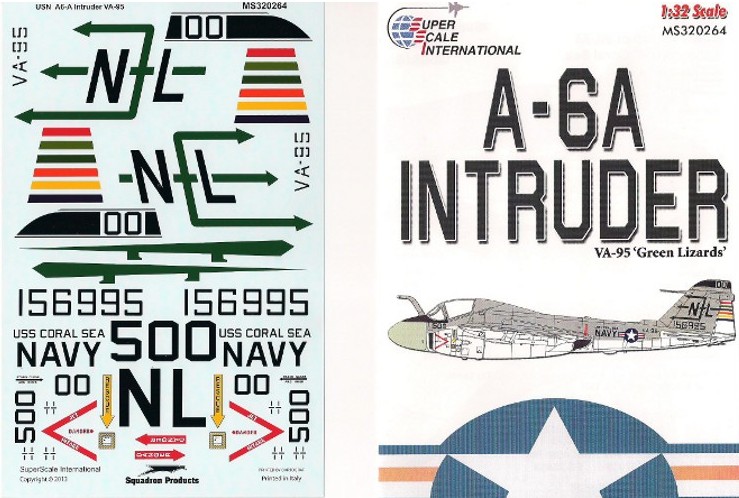
Some other minor changes to the decals:
- the red triangle intake warnings were used from the Superscale set, but reducing their length at the front leading edge.
- decreased the length of the Green Lizard decals on the wing fuel tanks by about 5 mm.
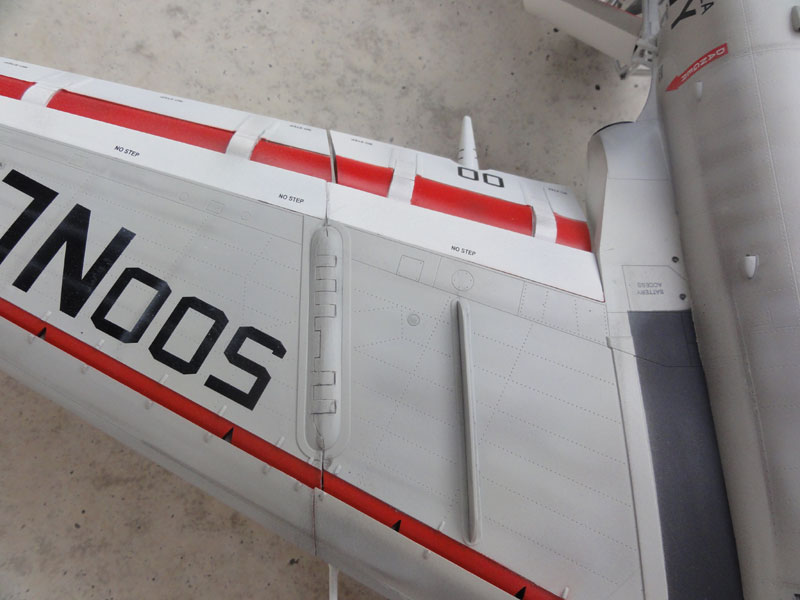
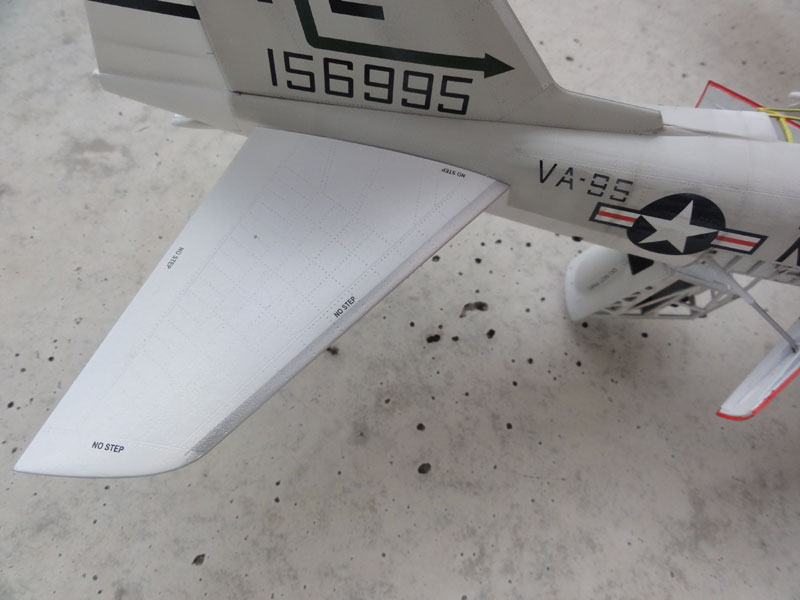
- the location and number of "NO STEP" decals can vary among A-6 Intruders, so I placed them on top of the wing flaps, spoilers, and stabilizer, where applicable.
- to ensure a good result, I did some black painting re-touch to the top fin black decal.
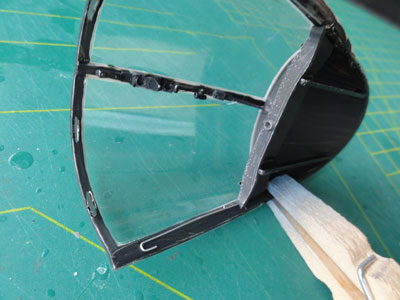
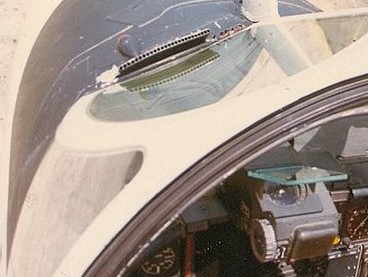
The canopy was enhanced with additional details inside the frame, some of which were provided in the kit and accurately represented. The frames were painted black on the interior. The mirrors were painted black on the front and a thin layer of aluminum foil was added to suggest mirror glass.
To make the canopy easily detachable, a metal wire attachment structure was created (not seen here).
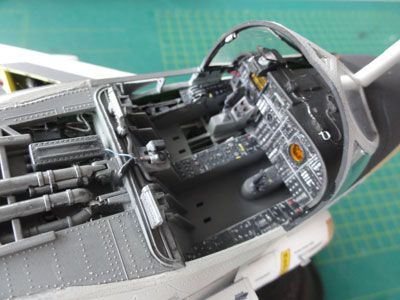
The pilot display part X3 and X4 seen
in STEP 4 were fitted. Also, the pilot control stick U7 and navigator stick
U9 were fitted. The windshield (that was already painted) and tank probe
M7 were installed, the tiny gaps filled with white glue and painted when
dry.
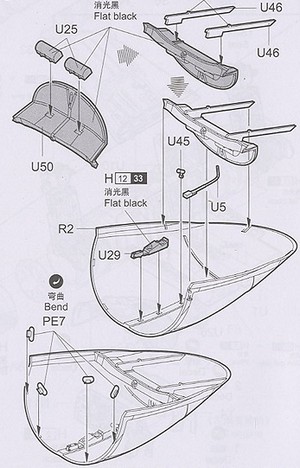
Sub-assemblies were installed, like
airbrakes, avionics bird cage, etc etc.
 .
.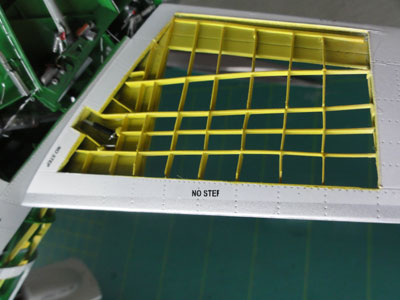
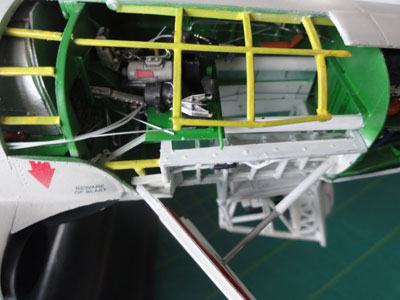
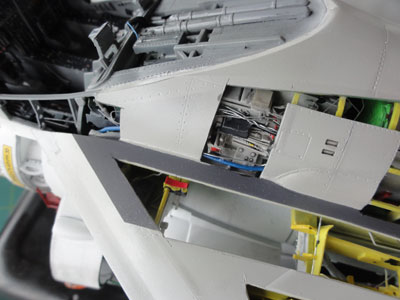
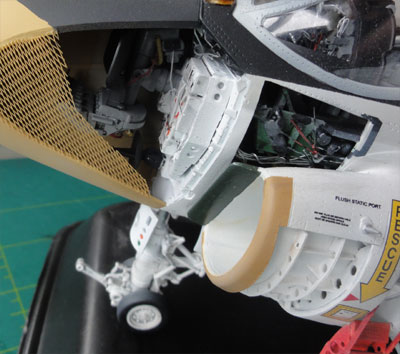
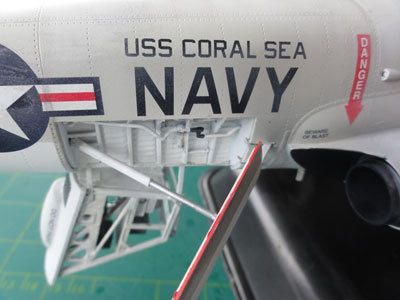
Now the overall model was further
detailed in interior bays, hatches and opened up panels with rod, stretched
sprue and small sparesbox parts. The scale is 1/32 so a lot is to be seen.
This took a whole afternoon. Use photos like the IPMS
NL Walkaround linked in page 1.
![]()
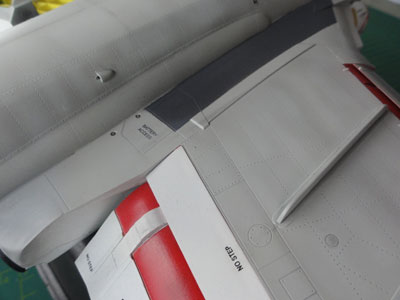
After decalling, the wing walkways
at the wing-fuselage junctions were airbrushed very
dark grey (I forgot them earlier). The intake lips I also forgot
got a Revell Aqua 36188 ocker brown / buff coat (so mask and airbrush).
The main and nose wheels themselves
were set in place now on the undercarriage legs with super glue.
 .
. x
x
To achieve a subtle weathering effect, various panels were airbrushed with colors of light gull gray mixed with white, and sometimes a bit of dark gray and black was added in places. To maintain subtlety, masks were held near the appropriate panels and rivet joints. Lower "white" surfaces also got an airbrush treatment with "off white," black "oil leak" strakes, and other details.
Afterwards, most decals, including the smaller stenciling, received a light coat of airbrushed paint to blend them into the surrounding areas. This step protected the decals, eliminating the need for a final varnish coat. The wheel hubs received a black wash using PROMODELLER wash, and other touch-ups were made as necessary.
 .
.
This airbrush retouching took quite
some hours in various days but is very rewarding.
![]()
Now a final small parts wrap up and
check was done going through the kit instructions and part "left overs".
- In STEP 23 the small antenna's, the PE parts, were set below the intake.
- In STEP 30, the small windshield
airflow vent is also in the kit , part O11. Also the small collision light?
is seen, kit part X1. These parts were set on the model. Here seen
on a real A-6:
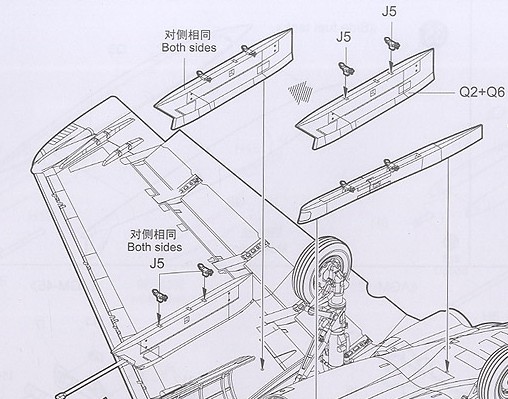
- Two external fuel tanks were installed
with their braces parts J5. The kit tanks are OK. The left tank got the
"cut-away" treatment.
- Engine hatches such as part V1
were set in place.
- The ejection seats, that were prepared earlier, got some additional red-white placards/markings painted on and were set inside the cockpit.
- The pitot in STEP 26 was replaced by a metal needle, set on the tail and painted.
- the aft sliding canopy was set in place but is detachable;
This completed the model! A very nice A-6A "Cut away" for a VA-95 Green Lizards aircraft.
On to next
[ Page 4....]

(c) Copyright Meindert "designer"/ All rights reserved. Your comments are welcomed by webmaster
October 30, 2014