[ page 3 ]

A-10 model in 1/32 scale Trumpeter kit
to page 1 2 3 4 5
Now, some additional work is done on the fillet between the main wing and the fuselage. There is a small gap, so this has to be covered; a small piece of plastic strip with some putty is used. This small correction makes a lot of difference later on. The wing will fit quite nicely now and the flaps will be drooped.

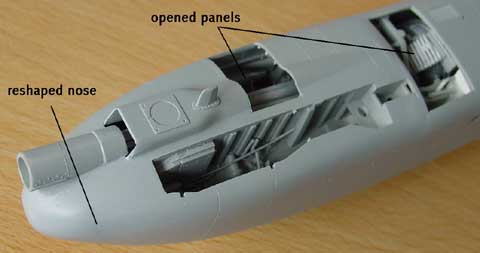
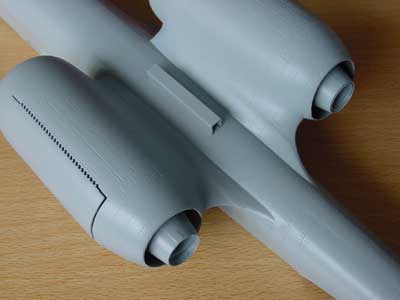
Also note the opened APU exhaust
(and inlet at the other side) below the engine pods area.
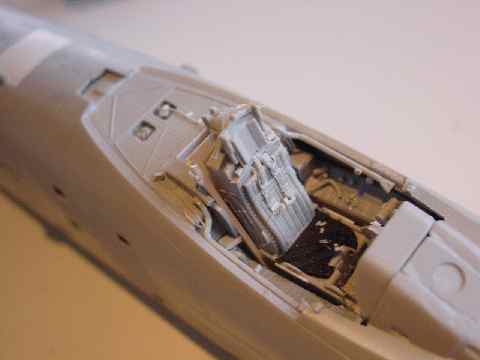
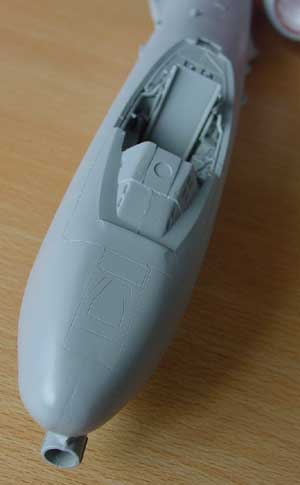
The cockpit area received some attention now before major assembly of the wing and fuselage as it can be handled easier at this stage.
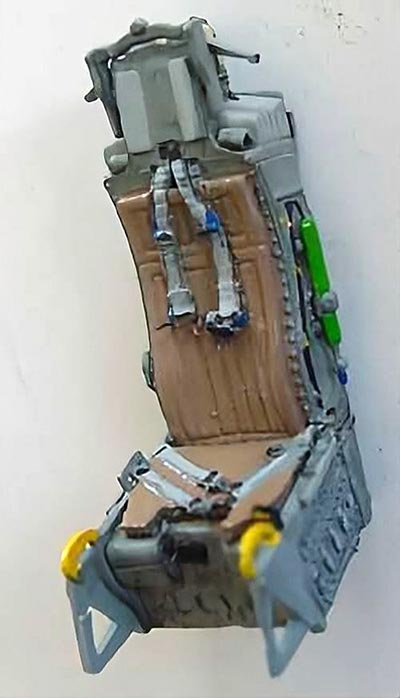
The ACES
II seat has some sort of backing plate and a new pair of launch
rails were made (you can also use the parts D16+D17 of the kit's seat).
The assembly is quite nice now and check that the seat can be positioned
into it.
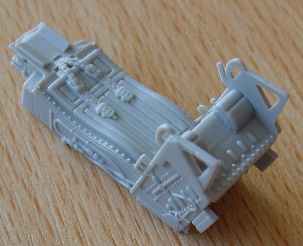
The kit's seat itself is very nice
with accurate detailing. I only slightly removed the rear strips in order
to fit into the new assembly. Also, a couple of seat straps were added,
some tubing and wires were added to the seat and also a "cushion" was added.
This cushion was cut to size from a piece of real leather.
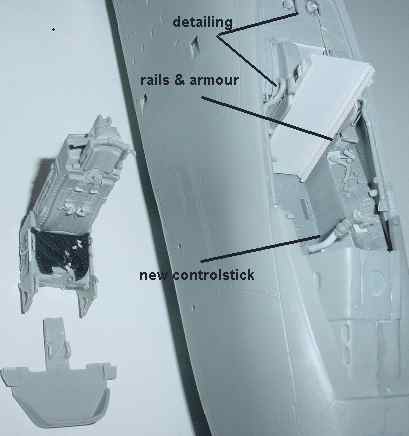
Behind the seat, a cut and bay should
be made to accommodate the canopy retraction mechanism. Also, onto the
rear panel some additional detailing can be added with wires, caps etc.
As the ailerons in this model will not be in the neutral position (as they
were cut loose), the stick will be set in an angled position.....
Note the boxed in area behind the
seat. (More details to be added later on)
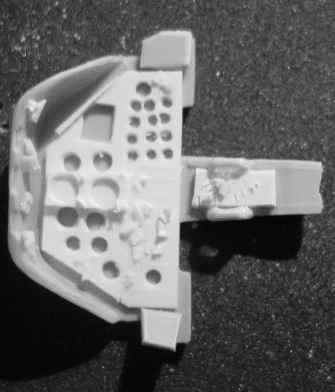
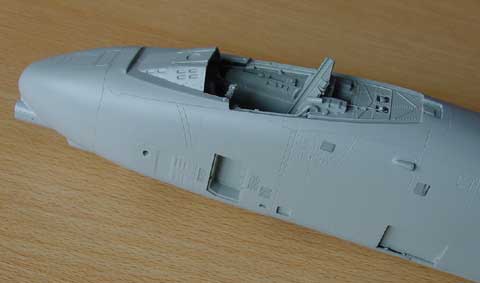
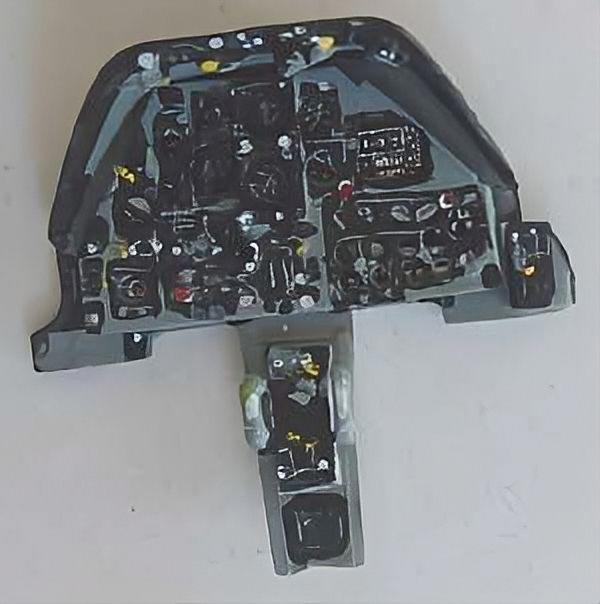
The instrument panel (not yet assembled
in the picture) in the kit is lacking details in this scale with only a
decal and clear strip being provided. This is very disappointing and in
this scale something has to done. From thin card, a new panel was made,
with holes at the individual instruments and thin pieces of card,
sprue etc to make the switches and knobs. Later on after painting, the
instruments will be made and glass faces added.
The instrument consoles of the cockpit
were also more detailing with switches etc. The side panels and cockpit edge
received also a couple of tubes for de-misting / climate control that are
missing and very well visible in the real cockpit of the A-10 Warthog.
This all will vastly improve the
cockpit area.
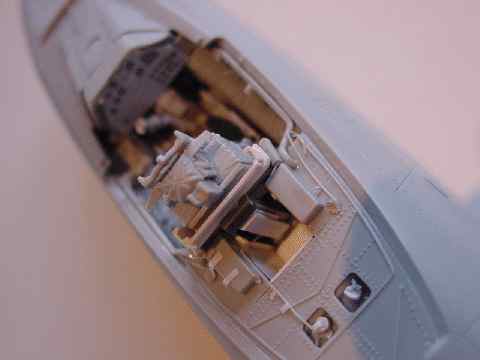
Later on, the instrument hood and
HUD will be further handled and detailed.
The seat was painted, straps to be
added later on...
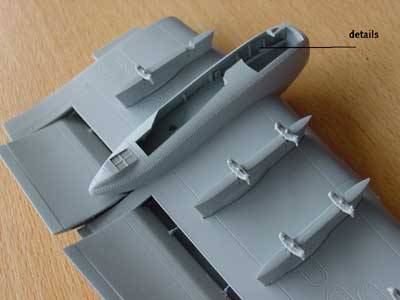
Canopy work on the scratch made curved transparent parts continued. The rear part of the moulded canopy was cut out and the shape at the base and in fact of the overall canopy was " fixed in width" and curve by gluing in a piece of strong metal rod ( a paper clip was used for this...).

At the front edge, a plastic stripe was only needed (mirrors to be fitted later).
Next, some strip and putty was used to get a smooth base. At the rear, the hinge fairing was also added.
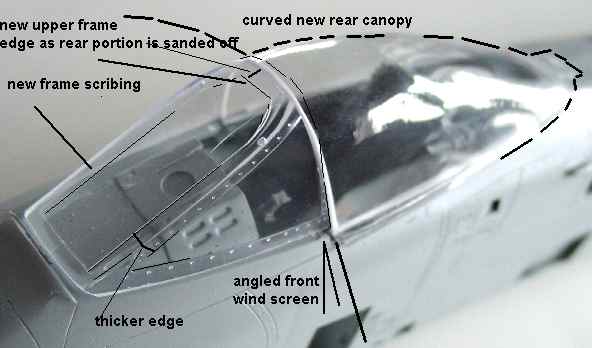
The forward kit wind screen can be used as it could be sanded at the rear end with at the rear a slight area being sanded off (angled position), so to get a tilted angle at the rear edge. The area lot is compensated with the newly made rear curved part.
Also, the front wind screen framing
can than be re-scribed/ corrected to be somewhat more straight and thicker
in areas. It look more like the strong A-10 screen now.
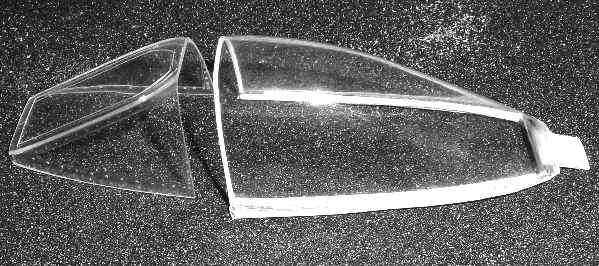
The largest improvement as envisaged is a very good overall canopy shape. So now, the rear canopy has a curve, an angled base and the windscreen / rear canopy edge have a tilted look.
The overall clearness is excellent, only a final polishing with Tamiya rubbing compound will be needed.
Next steps will be to add tubing, details, locks etc in the canopy parts.
The nose shape was as noted changed and after several putty coats and sanding got its grey primer color.
The wing also got a grey coat; note
the aileron and the noticeable gap.
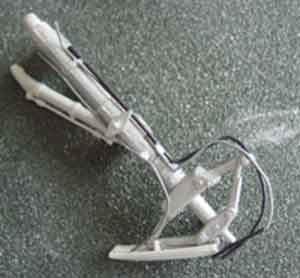
The undercarriage legs as supplied
in the Trumpeter kit are excellent and strong from a metal casting. After
trimming with a file, added details were the braking tubing and smaller
parts. The legs parts are an excellent basis to get very accurate legs
as on the real plane.
 .
. 
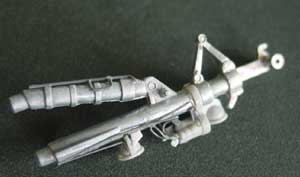
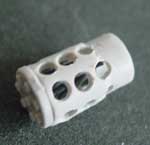
The Avenger gun nozzle holes were
drilled out, vastly improved the look. Inside, some "barrels" from rod
were added.
The lower bay hatches/ panels were
also left open to show some detail of the canon. The kit has very nice
canon parts that you really want to show.
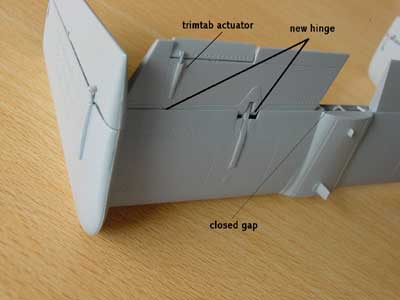
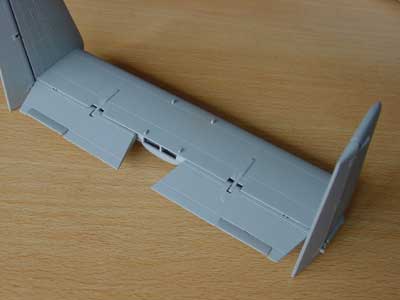
The stabilizer got additional small
trim actuators and fairing. The changed hinges can also be seen. Also the
gaps were closed besides the central the fuselage attachment fairing.
The fit of the nacelles and their
pylons to the main fuselage needs some putty and some sanding. The end
result is seen here.
The cockpit main instrument panels
was also painted now and detailed with paint and using "instruments" from
decals of the decal spares box...

(c) Copyright Meindert "designer"/ All rights reserved. Your comments are welcomed by webmaster
Created this page February 7, 2003