Lockheed Martin F-16I
SUFA "Storm"
[ Page I-3 ]
F-16I SUFA using the Academy kit
... continued from page I2....
Step 9
Dorsal SUFA spine with the particular fairings and sensors is nicely done. Fit only after completing the lower and upper fuselage and intake fit.
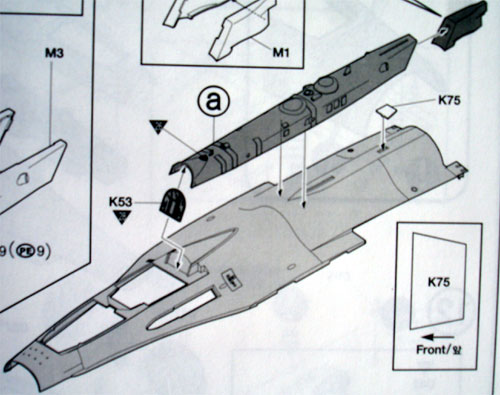
(note: spare part K17 can be used for conventional F-16D two seaters).
Step 10
The two CFT
(conformal fuel tanks) which are a very special feature of the SUFA kit
and can now be fitted. I think their shapes are pretty wel captured and
note that is a rubber sealing on the real plane between the CFT and upper
fuselage.
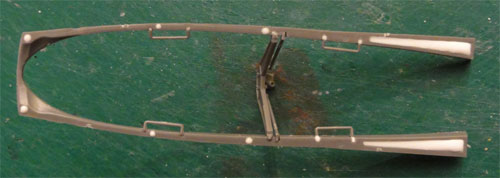
Steps 12-14
The gear assembly
shows to used slightly different wheel parts as compared to the Academy
F-16CG/CJ kit, but the wheels, brakes and their hubs
have been improved
as compared to the first kit:
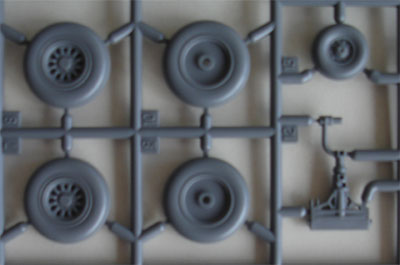
t seems that
Academy has changed in the F-16I SUFA kit slightly the shape of the main
wheels (parts D7,D8,D9,D10) as compared to the similarly numbered wheel
parts on the F-16CJ kit. Also, for later heavier block F-16 planes, the
wheels may need a more accurate representation. Note that the SUFA kit
has different anti torque parts D31, D32.
The main gear leg assembly seems OK to me. I am not sure if the legs should be thicker or not for later heavier blocks; for the SUFA model, I simply used kit parts as instructed.
Reduce the beam part #D27 2 mm in length to get a correct setting of the forward gear nose leg. Academy provides 2 parts for choosing the nose gear door (#D77 / D76) but I could not see a difference. The kit has the correct main wheel hubs and bulged gear doors. Probably for the SUFA, the inner nose gear door has a different structure as on the kit part.
The nose gear bay and door seems OK with the typical lighter style lights (parts L15+D45). This is also appropriate for F-16 SUFA types were the lights were placed on the nose gear.
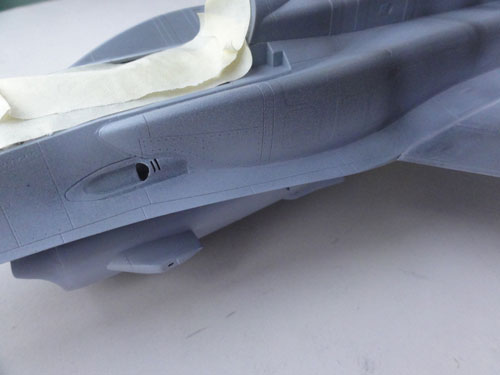
Step 15
Additional
fairings and adjusted air intake scoops provided for the SUFA.
Steps 16-17
Two types of
engine exhausts are still provided, either for the F100 or F110 engine.
For the F-16I SUFA, (block 52+ and higher) , it seems that the PW229 is
needed and the kits parts are probably not 100% correct for this engine.
But really, I could not find a real big difference.
here you see
the new exhaust covers for the PW229 ...
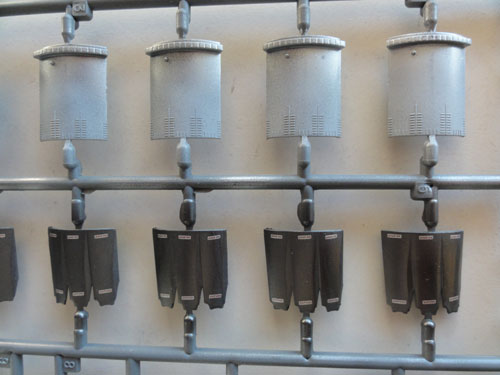
as compared
to the older F100 parts also in the kit....
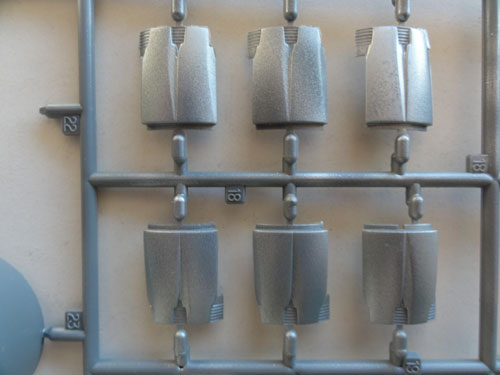
The engine exhaust and the covers will be fitted later.
The airbrakes are OK, but were selected "closed" for this model; if you want to display them open, add a couple of two very tiny spring doors at the hinge base from thin card. (look here...)
Steps 18-19
Similar wing
assembly as on the Academy F-16CG/CJ kit and includes the RWR fairings
on the leading edge for the SUFA.
Please note that the strength of the wing joint-fuselage is very weak, so make a strongth joint with lots of glue. Some filler is needed here followed by sanding.
The Parts B13 for the static dischargers; these are best replaced later on with thin electric wire.
Step 20
Assemble the
trailing edge flaps as shown. You need filler at the seams:
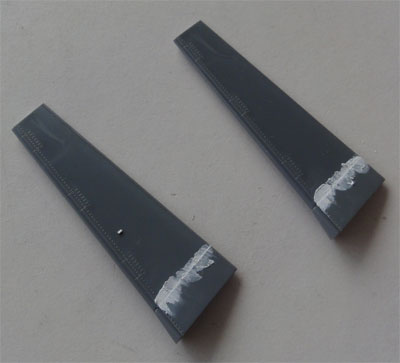
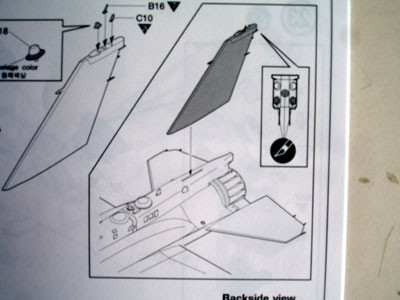
Step 21
The vertical fin looks similar as
to the Academy F-16CG/CJ kit, but with the base removed as it is to be
fitted on the dorsal spine. The older vertical fin as of the Academy F-16CG/CJ
kit is still in the kit (parts B11 and B12) can be used for a normal F-16D.
Step 22
The radar is
similar as in the Academy F-16CG/CJ kit. The nose radar cone is
now 2 parts but almost 95% identical as on the Academy F-16CG/CJ kit. The
metal pitot tube attachment base is a bit different with very tiny differences
in the anti-lightning lines.
Step 23
The instrument
cover part K67 is all new for the F-16I SUFA as well as the mid fairing
part K68. It looks much better now. The HUD looks similar as in the Academy
F-16CG/CJ kit.
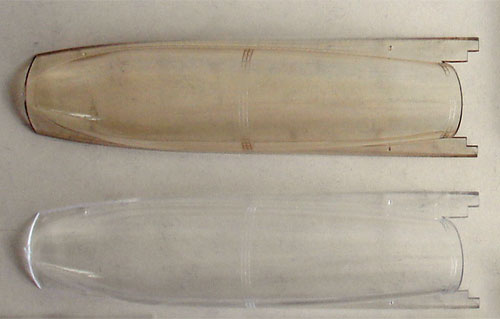
Step 24
2 two seater
canopies are provided, a very nice feature: tinted "gold / smoke" or clear.
The small kink in the canopy base (part K3) is very well done (this was
an important error in the resin ISRACAST two seater conversion set, which
missed this kink shape). Central mould seam is very small so can be easily
polished away.
The problem
is a bit that the forward halve on the SUFA is smoke whereas the aft half
is clear. Always I have difficulty to spray on an even smoke colour, even
if I use Tamiya SMOKE. An option may be to cut both canopies in half and
merge them. (to be considered later).
The canopy frame has some gaps, fill
these as seen here:
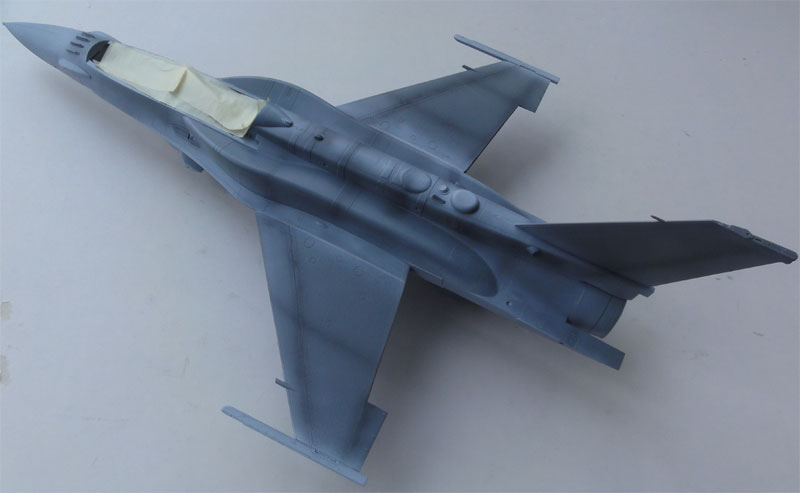
The rest of kit with major assemblies was now done.
The overall kit was given a coat of light grey to check for any flaws like unfilled gaps etcetera. After fixing the small problems with putty and sanding, it was now time to move to applying the other top coats.
First some black pre-shading was done and the lower areas, Fed.Std. 36375 was used with acrylic paint Mr.Color/Gunze Sangyo H308. (Academy indicates another colour 36320, but I believe it should be 36375).
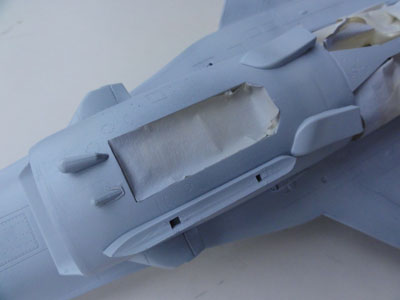
Some additional
notes:
At the rear of the wing-fuselage
joint, there is a step when fitting the metal part PE5 / PE6. This a radar
absorbing panel. I had to fill the step with putty to get a smooth result: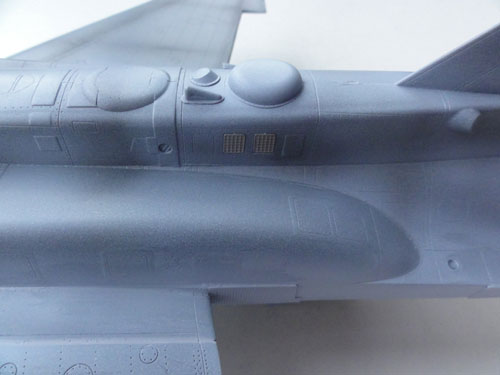
The Conformal Fuel Tanks are fine
to me, studying pictrures they look right. Please note that on the real
SUFA there are rubber strips between the CFT and the fuselage, I will try
to paint these later on. For now, the gaps were filled with white glue.
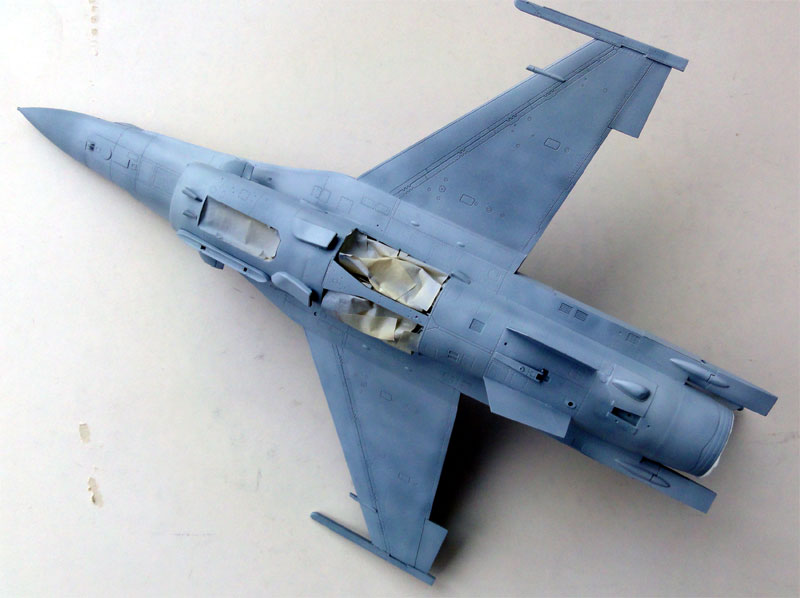
Here the slat area is seen, with the
later style F-16 block "3 fingers" slat hinges.
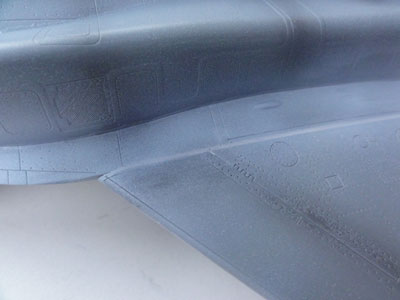
The temporary result is seen here:
Next steps is moving to add the top
camouflage of the IAF SUFA and adding then the detail parts.

(c) Copyright "designer"/ All rights reserved. Your comments are welcomed by webmaster

Created this page
January 2, 2011