Lockheed Martin F-16 Fighting Falcon
[ Page H2 ]
F-16 models
in 1/32 scale
Hasegawa
kit conversions: F-16C "late Block 30" and F-16A MLU conversion
continued.....
![]()
![]()
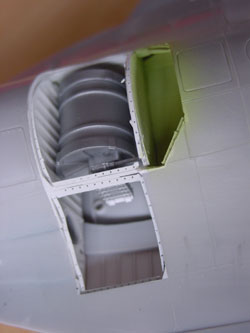
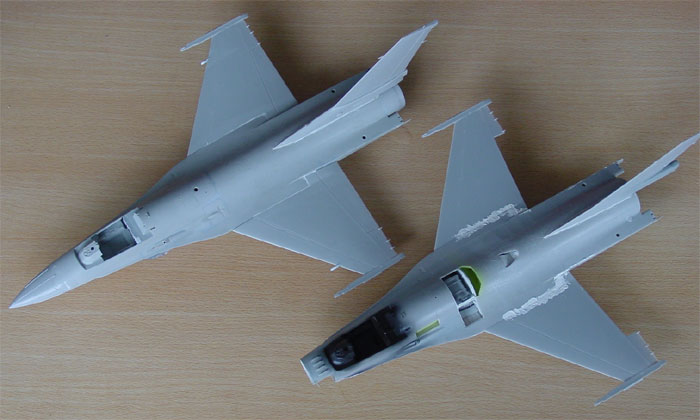
[H1] The F-16A MLU got the parts in the opened bays when they otherwise would not fit later on. For example the gun drum and engine bay bulkheads.
 ..
..
before and... after more detailling
The kit was further assembled, with adding the wings, vertical tail. Only minor filling is required.
NOTE: early
F-16's before and up to block 30 have at the leadding edge flap/slat at the inboard position
only "2" rotating fingers". Later block beyond block 30 F-16 have
there "3" fingers. Probably this is modification applied later to cope
with fatique issues.
The old Hasegawa
kit leading edge flap/slats have indeed "2 fingers" which is correct for the earlier F-16's. The
Academy F-16C and Tamiya F-16C have the "3 finger" style inboard slat rotating
fingers.
 .
.
The detailling
in the remaining other opened bays will be done later on. First the model
will be finished as far as possible; this will prevent damaging the required
fine bay details along the way.
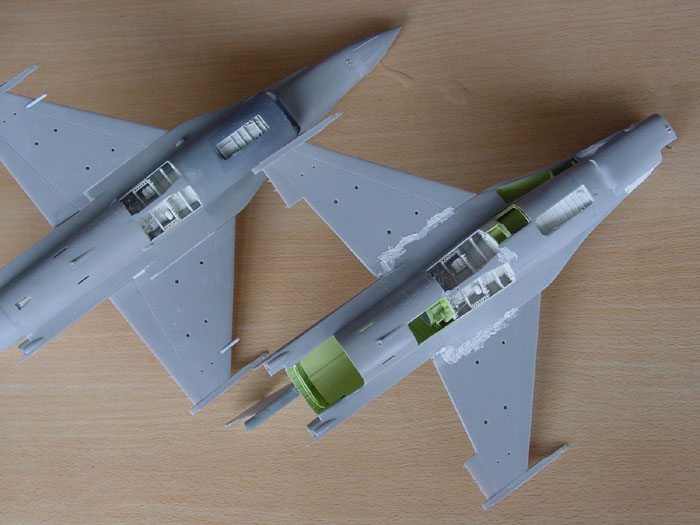
[H2] F-16C "big
mouth" also got its wings and tail.
An important detail added on the [H2] F-16C kit were the missing in the kit warning receivers for the F-16C on the wing leading edges (seen below on the model on th left). These were made from plastic rod, sanded, put in place, filled and that's it.
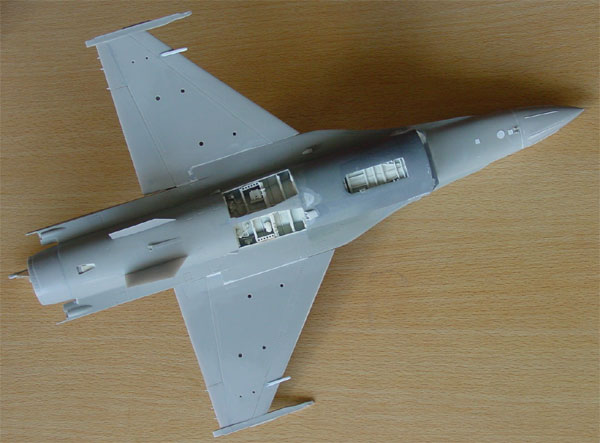
Kit lower areas, some details to be added.
Of each kit,
the radar noses were detailed with very thin stretch sprue to suggest the
lightning protection dischargers.
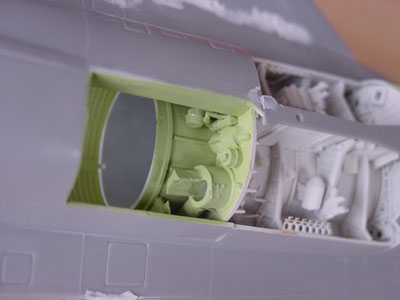
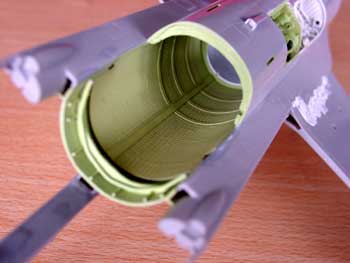
Below, of the
[H2] F-16C conversion, the larger "big mouth" intake is seen

Also, in various
areas small panel details were added from very thin card.
The two kits
seen here with main assembly done, ready for sanding.
F-16C
: in front
of the left wheel bay, a missing vent/exhaust was made from card.
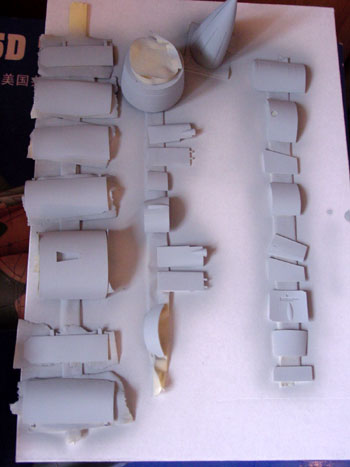
Here, some of the various smaller (opened) panels can be seen, with a grey primer coat applied with the airbrush.
Small strips
of plastic on the pylons and the underwing fuel tanks were also added.
It required extensive use of thin stretched sprue.
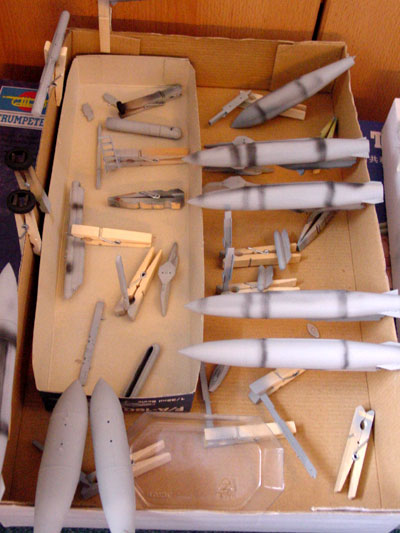
The stores
were all given a coat of grey primer for checking for any small gaps and
flaws. (note: in the picture some of the Tamiya and Academy kit stores
are also shown).
Note also the
black pre-shading sprayed on as also seen below. This will highlight a
bit the inscribed panel lines later on and suggest some depth. Note: do
not over do it!
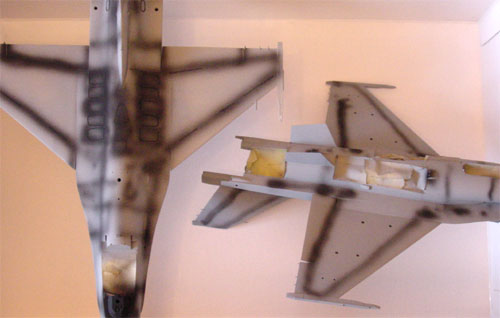
The kits are seen here. They were ready to get their first grey primer. Masking was done and for the light grey primer coat Revell 76 grey was used. Next, the kits had a check up for flaws (these were corrected when needed) and then some pre-shading was applied with black paint. This will accentuate the panel lines later on.
![]()
Colour
Scheme
![]() ..
..![]()
A Dutch MLU
F-16 was to be made for which decals were separately obtained (more on
that later on).
For the other
F-16C "early block 30" with the new "big mouth" a USAF scheme was choosen.
The next step was to apply the overall camouflage colours of Federal Standard that were applicable to both the Dutch F-16 MLU and the USAF F-16C to be modelled:
FS36118
Dark grey (using Humbrol 125 )
FS36320
Medium grey (using Humbrol 128 )
FS36375
Light grey (lower surfaces, using Humbrol 127 )
(Please note that on modern block F-16's, the medium grey is no longer in the scheme).
The colours were sprayed on with the Badger airbrush.
On to next
Hasegawa page [H3]....

(c) Copyright "designer"/ All rights reserved. Your comments are welcomed by webmaster
Created this page December 2, 2005