Lockheed Martin F-16B Orange Jumper
[ Page B-1 ]
F-16 models in 1/32 scale made by Meindert de Vreeze
F-16B converting the SUFA Academy kit
F-16 home
page 1
page B2
page B3
page B4
page B5
page B6
For more
details on this F-16I SUFA kit look at this page.....
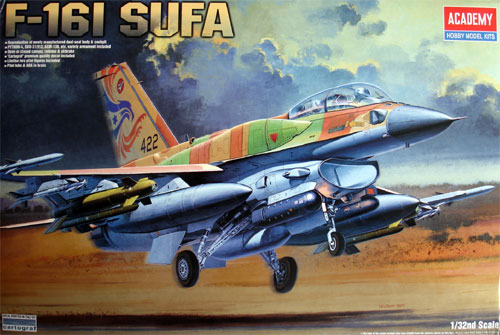
The kit will
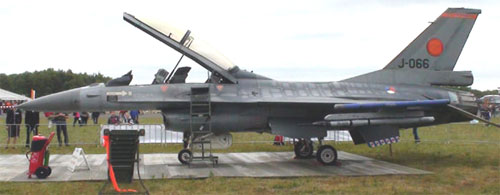
be converted into a Royal Netherlands Air Force F-16B MLU test aircraft,
called Orange Jumper.
More info including my own ORANGE JUMPER Walkaround can be seen on the Dutch IPMS.NL page here... [external link]![]()
 .
.
Orange Jumper
It seems that parts for a F-16D are included in the Academy kit like fairing aft of the canopy as replacement of the dorsal spine and additional instrument panels. The standard F-16C/D vertical tail is also still in the kit as well as different armament and both large and small intakes. tail para packs and housing options are also still there. The bulged main gear doors are only there and an extra sprue with the pilot figure parts.
The vertical fin is almost similar to the one of the Academy F-16CG/CJ but has a very tiny extra panel line and misses the base for which the dorsal spine is used. (it needs adaption for older block F-16 models like the F-16B).
Fortunately you will find also an
unused fairing for conventional two seater F-16 planes like the F-16D and
F-16B!
 .
. .
.
and other unused parts.
 .
.
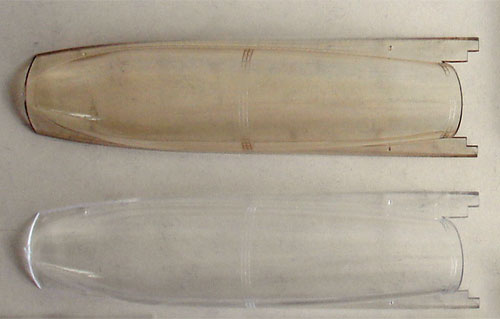
- two
smaller sprues with transparent parts in a clear and smoke tinted variant.
You get 2 !!! two seater canopy parts!
A step by step approach will be presented in this F-16B MLU two seater "orange jumper" modelling report.
Basic preparations
Almost no flash is present on this
excellent moulded 1/32 Academy kit, so only minor clean up is needed. Next,
some parts were given a coat of mat white to have better coverage like
the air tunnel intake.
NOTE: If you wish to have a detailed ammunition and gun bay on your two seater F-16 model, cut-out the upper fuselage panels now, look here for instructions...
Exterior
Panels
Before proceeding to next assembly,
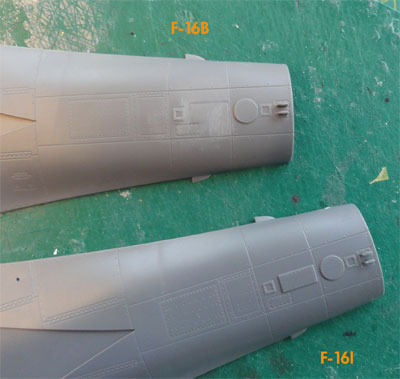
the main exterior airframe particulars of the F-16B were tackled.
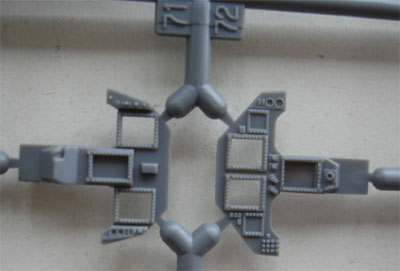
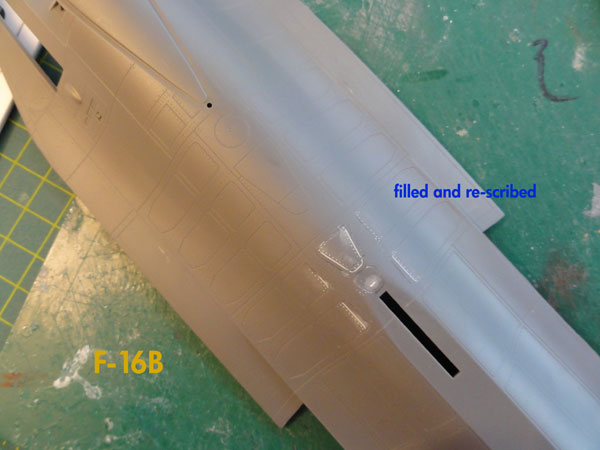
1. the F-16B does not have the F-16I
chaff dispensers aft of the main gear bay , so these were filled
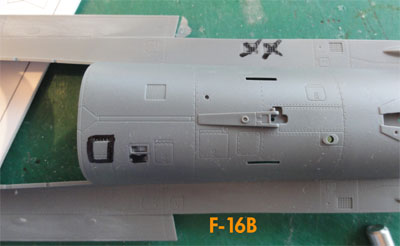
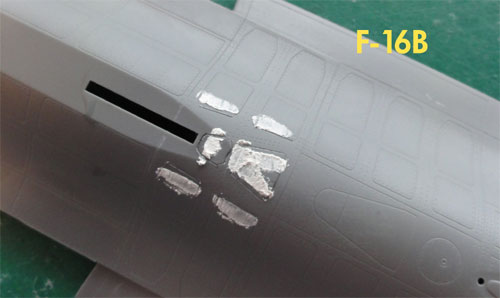
2. directly aft of the main gear
bay, the access door is a bit different, so fill and re-scribe.
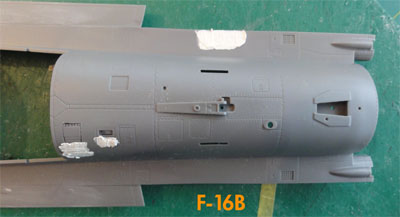
with the result here....
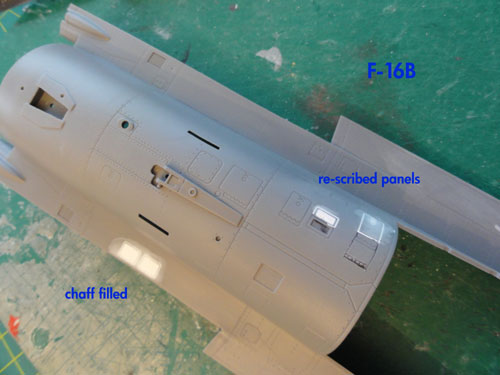
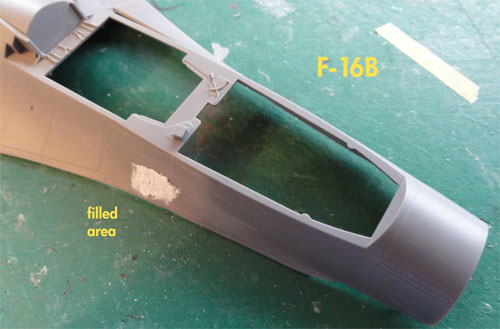
3. the F-16B does not have the large
panels next to the cockpit area, so this was filled and cleaned up.
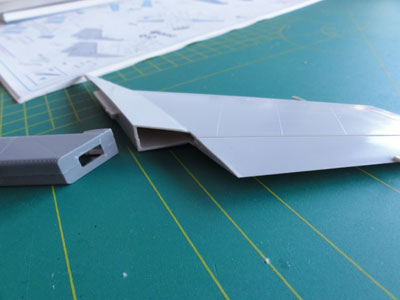
4. no small "bulges" are seen on the
earlier block planes like the F-16B, so sand flat both on top of part A1
and lower part A2
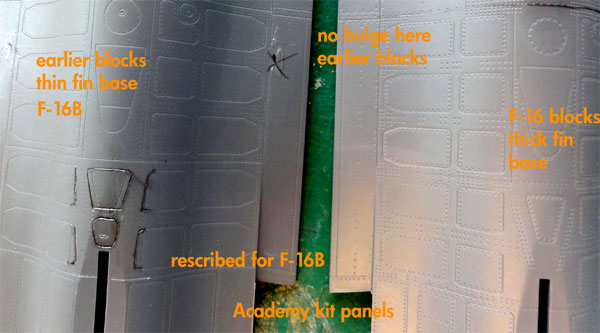
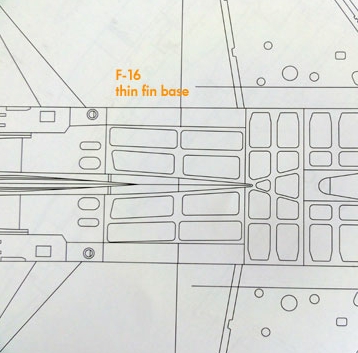
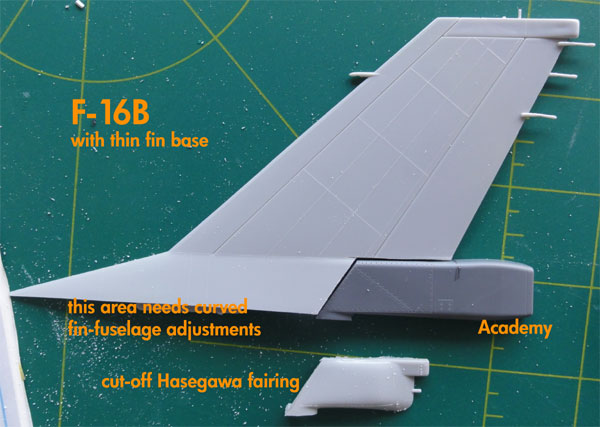
5. the F-16B has the thin vertical
fin, so we have a major modification here. This also means that the panel
lines are a bit different directly forward of the vertical fin base and
aft of the refuelling panel.
Some re-scribing and filling is needed.
.... pencil drawn...
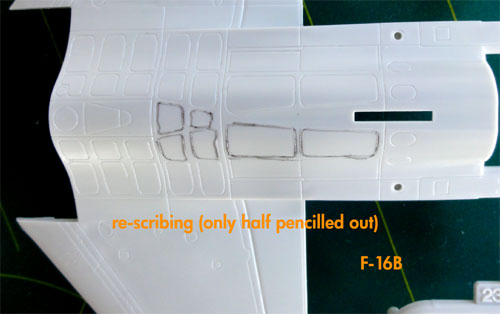
With the result seen here after sanding....
Please note that later MLU modifications including on the F-16B of the Dutch AF also include fuselage and wing stiffeners/ strengthening panels at various locations. These will be added later.
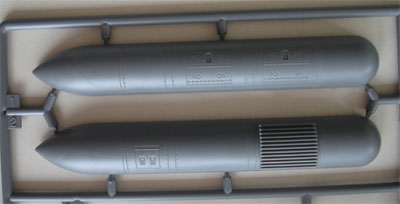
6. Also sand flat the raised panel on scoop part K28 (as seen in the kit instructions step 5). This large scoop intake is not present on the F-16B.
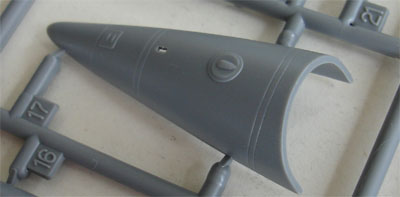
7. The raised forward nose panel on
the F-16B seems not so visible, so sand flat.
Vertical
tail
The F-16B has the original thin base
vertical tail like the very old F-16 blocks. Now, the Academy 1/32 F-16CJ
and F-16I SUFA kits are for later block aircraft with the thick tail base,
so modification is needed here.
Fortunately, I still had a spare thin
base tail of an old 1/32 Hasegawa kit,
so this was thankfully retrieved form the spares box. If you do not have
such a spare part, you will need to used thick plastic card and replace
the thick base.

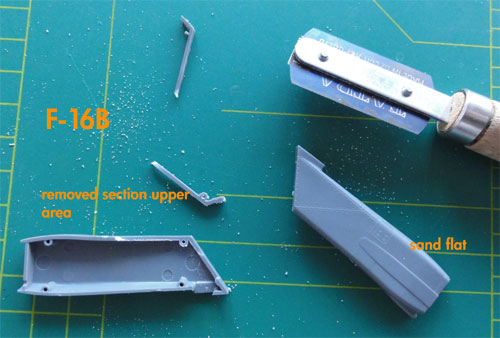
The parachute housing for the Dutch
Air Force F-16 aircraft is also different, but luckily the basic parts
are in the Academy kits. (check the parachute housing for the particular
older block F-16 models, they vary considerably on the real planes). So
a section of the Hasegawa kit tail halves needed to be cut-off.
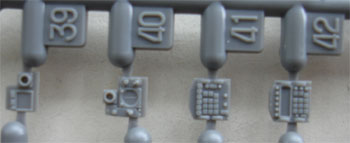
The Academy kit parts B1, B2, B17
can be used for the parachute aft housing.
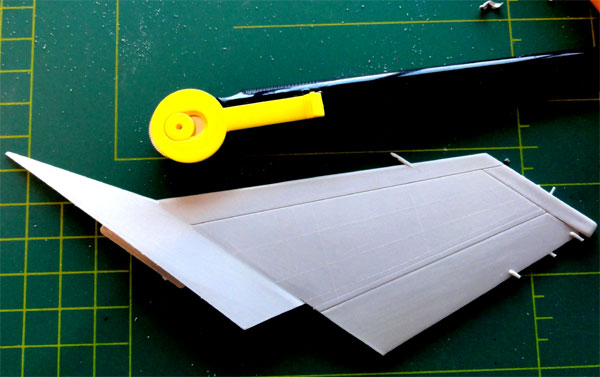
Also at this point, with a Trumpeter
riveter tool, the vertical tail halves got indented rivets.
The Academy kit parts B1, B2, B17
need adjustment to match the F-16B vertical tail cross section profile.
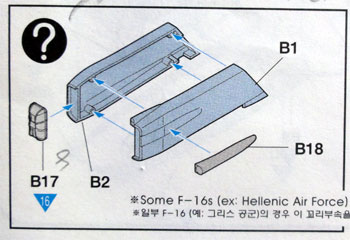
Do not use part B18 for the F-16B.
Later on, 2 additional fairings will be added instead. Sand flat the right
area on part B1.
This was done with a razor saw and
needed filling and sanding. The result is seen here....
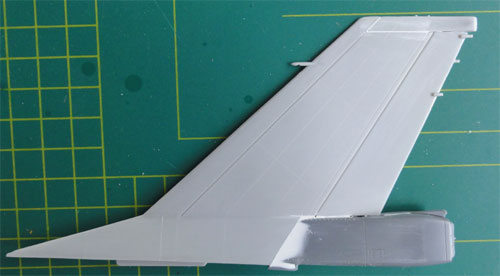
The whole assembly was glued, set
to dry for 24 hours. After filling and sanding, the result is seen here.
(Please note that the Dutch AF parachute fairing has some additional smaller
fairings on the sides, these will be added later).
Sand the parachute fairing flat on
all sides. Part B17 is the parachute rear and looks fine.
Please note that this thin base fin can not be simply set onto the top fuselage as the fuselage curve needs to be set more round. This will tackled at a later stage with plastic strip, filler and sanding.
![]()
Now lets
proceed to next assembly steps....
COCKPIT AREA
Kit Instructions
Steps 1 - 4
The cockpit
area of the two seater is using the Academy kit parts pretty well detailed
and can be very well used for a F-16B. The trick is that older style instrument
panels e.g. as sued on older blocks like the F-16C can be found on the
sprues and using a razor saw and replacing them a decent F-16B cockpit
interior can be made.
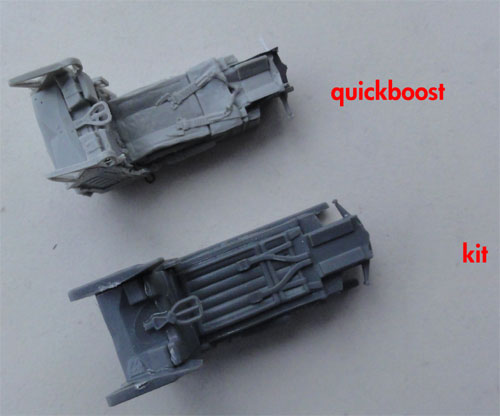
The two ACES
II seats are OK but straps are moulded on (Remove these and make separate
straps). Alternative is to use e.g QuickBoost
resin seats. It is noted that the Quickboost seats are smaller than the
kit seats, and I have the impression that they are better than the kit
seats:
So what should
be done for a proper F-16B cockpit?
In the kit
the pilot's instrument F-16C panel parts are still on the sprues and look
OK for a F-16B when using the kit parts C56, C64, and the transparent parts
G9.
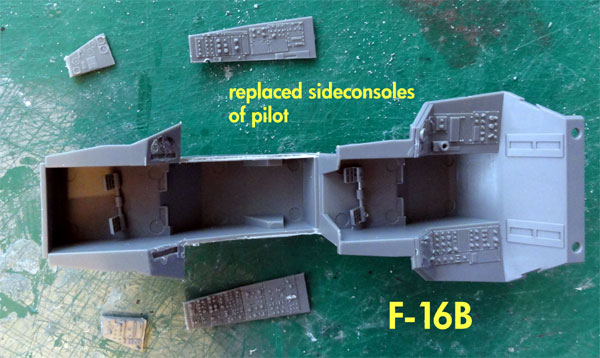
The side consoles
of the pilot were sawed out and replaced by the sawed out sections of the
F-16CJ tub part C40 still found on the sprues.
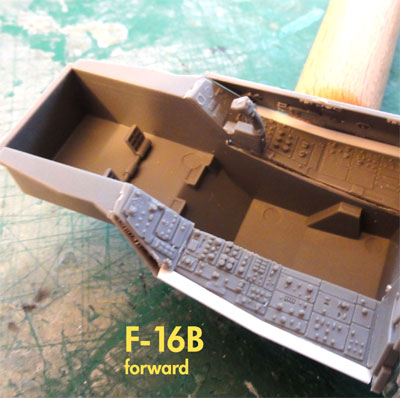
Next, for the F-16B forward pilot
tub, replace parts K20, K21 with the Academy F-16CJ parts C30, C31
and C64.
There remains a gap between the side
panels and the instruments, some plastic card and white glue is needed
to close the gap.
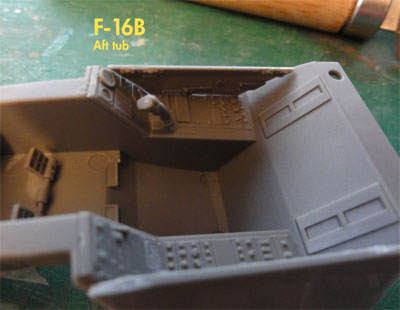
For the aft tub the aft tub of the
F-16I can be used for the F-16B but with some smaller modifications.
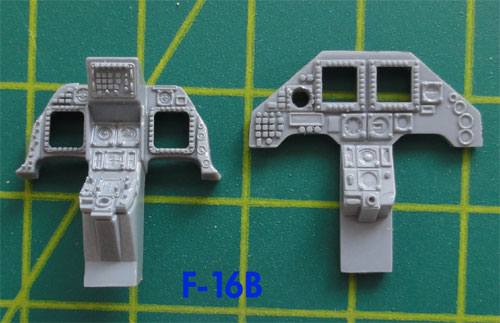
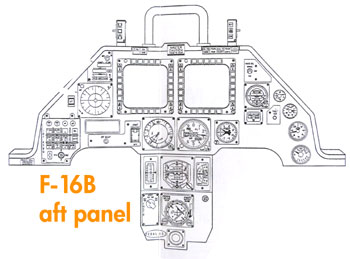
The aft instrument panel K69 can
be used, but a small circular azimut indicator should be included by simply
making a round hole.
In the aft cockpit, the right side
panel K24 should be set a bit more vertical than as suggested in the kit
instructions. So trim this part and fit more vertical directly next to
the right instrument panel. Some trimming also is than needed at the rear
panel K18. The part K19 looks almost OK for the F-16B but flat sand a tiny
rectangular panel on this part.
For the rest of the tub assembly do
indeed use the bulkhead part K56, the stick parts C21 and replace stick
K60 with part C46.
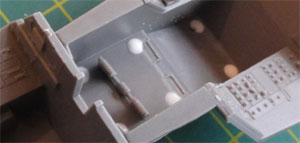
The small ejection pin marks in the
tub were filled with white glue.
The main areas are for the MLU versions black with Fed.Standard FS36320 medium grey (using e.g. Humbrol 128 ) details like at the seat tubs. This is to enable the pilots to use night vision goggles and avoid blinding them.
The whole cockpit tub assembly was given first a coat of medium grey and the black areas hand painted. The instruments were are painted black and the raised details were high lighted by simply SANDING off the black paint in areas and by inscribing with a scriber the individual panels.
The same was done on the main central
instruments, to be set in place later. Tiny coloured details were are now
added, not a lot of work here.
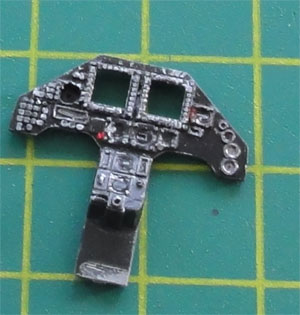
Aft F-16B main central instruments,
with CRT still to be added.
Back to F-16 page 1.....

(c) Copyright "designer"/ All rights reserved. Your comments are welcomed by webmaster
Created this page
October 16, 2010